I once saw the instrument checkride as just a test of talents and know-how. Soon, real life hit, complete with a headset and piles of paperwork. In the United States, it’s like a complex social tradition: a mix of merit, stamina, and paperwork woes.
This guide aims to eliminate shocks, not just pack your head with info. Sure, the written exam is key. But, the real test starts when the oral feels more like a grilling than a chat. Ever noticed how a single unsure answer can lead to more tough questions?
My real test came during a grueling day that started at 7 in the morning. There was a drive for an hour, then flying for another hour to reach the examiner’s area, with challenging weather. Then, the oral questioning felt endless, taking around 4.5 to 7 hours, breaks included, before we took off again at 17:30 for a tough 1.4-hour flight session.
When it was time for takeoffs and landings, tiredness and harsh winds made easy tasks seem impossible. The real lesson of the IFR checkride? It tests more than just smarts. It’s about lasting, making good choices under stress, and speaking carefully.
Now, I’m tackling the written with a planner’s mind, not just as a learner. We’ll figure out how instructors and examiners think, then prepare wisely. This way, the checkride will feel like a well-followed map, not a hurricane you barely survived.
Overview of the IFR Written Exam
The IFR written exam is your first big step. Think of it as airport security, but trickier. It tests if you know your stuff. Pass it, and you’re ready for the next challenge.
Your score won’t help you fly, but it shows what you need to work on. Weak points might get noticed during your checkride. So, see the written exam as a guide to what you need to study more.
Getting started has its own hurdles nobody talks about. There’s check-in, ID, forms, and proving you’re eligible. It feels like a pre-show hassle. A messy start eats into your focus before you even begin the exam.
In Canada, the paperwork is strict and based on a timeline. They call the exam the INRAT and it comes with a deadline. You need to pass it within 24 months to move on to the flight test. It’s all in the Instrument Rating flight test guide. Make sure you understand the rules before you think you’re ready.
| What to Bring | Why It Matters | What It Protects You From |
|---|---|---|
| Government-issued photo ID | Confirms you’re the right pilot in the right seat | Delays that drain focus before the IFR written exam even starts |
| Proof of passing the INRAT within 24 months (where applicable) | Meets the eligibility rule tied to flight test admission | Showing up ready for the instrument checkride and getting turned away |
| Pilot certificate or license info and current medical documentation | Verifies you’re legal to act as PIC for training and testing | Last-minute administrative scrambles that feel like turbulence |
| Letter of recommendation (when required) | Signals instructor endorsement for test readiness | A preventable “come back later” conversation with an instrument examiner |
I keep my goals simple: the written tests your knowledge, not your confidence. It rewards remembering facts, understanding terms, and being thorough—first on paper, then in the plane. Master that, and your pilot path becomes smoother.
What’s Tested?
The IFR written exam isn’t just about knowing a bunch of terms. It tests how you navigate the rules, weather, and workload. You’ll see questions on departures, enroute charts, approach plates, regulations, weather products, and how you make decisions.
I quickly saw that doing well on the test mirrors real flying habits. Giving clear answers shows you’re organized: you plan ahead, brief your flight thoroughly, and stay on top of the paperwork. This is crucial for the instrument checkride, where you need to demonstrate actual piloting skills, not just quiz smarts.
Let’s look at an approach setup trick. If you start an approach at the VOR, you might face a difficult 120° turn. While doable on paper, it’s harder in flight and might lead to bad habits in turning.
But if you pick a more realistic entry point, the turn might be an easier 60°. Smaller turns are simpler, both to execute and to follow, helping you avoid cutting corners. These tips, that look basic at first, are actually valuable for the test.
The exam also tests your understanding of real-world IFR scenarios. Just because you fly over a fix like DRYDN doesn’t mean it’s the best for real flying. The test subtly checks if you’re choosing smartly, not just grabbing any option.
| What the question looks like | What it’s really testing | How it shows up later |
|---|---|---|
| Pick the correct IAF and course for a published approach | Prioritizing a sensible entry, not just a legal one, using IFR knowledge areas | Cleaner briefings and fewer “wait, what are we doing?” moments on the instrument checkride |
| Interpret a hold or procedure turn with timing and wind | Geometry discipline, instrument scan, and workload management | Less chasing the needle, more stable tracking when ATC adds a reroute |
| Decode a METAR/TAF and pick alternates with minimums | Risk decisions under rules, not vibes | Better go/no-go calls and smarter Plan B thinking in IMC |
| Apply approach minimums, missed instructions, and fix crossing | Memory plus sequencing: what happens next, and when | Fewer surprises when the missed approach becomes the main event; practical test tips pay off |
Study with a focus on accuracy and decision-making, and the IFR written feels less random. It becomes good practice for real IFR flying, where making reliable, uneventful choices matters most.
Best Study Resources and Tools
My favorite IFR study tool is pacing, an often overlooked method. Preparing for the instrument pilot oral feels like an unending TV series marathon—planned for 4.5 hours, stretching to 6–7 with breaks. Yet, you must remain alert. I center my tools on building endurance instead of just going with the flow.

I intentionally keep my knowledge base simple. Gleim and ASA offer great repetition and help identify weak spots effectively. To wire my brain for IFR, I rely on the FAA’s guides and the AIM to ensure I’m speaking the examiner’s language. This approach keeps me grounded and ready.
What really helps keep me sane is simulation. I set aside long periods that copy the real test conditions but include breaks like a quick walk or water break, avoiding my phone. Afterwards, I do a short session where I simulate real flight conditions. It’s like a rehearsal, and it’s crucial to practice handling pressure.
Good practice habits are crucial. Whenever a method results in mistakes—like an unrealistic maneuver—I address it quickly with my instructor. It’s easy for bad habits to become normal if not corrected. The best tool identifies and fixes errors quickly, preventing them from becoming common in your prep.
| Resource | Best for | How I use it | Fatigue-proof tweak |
|---|---|---|---|
| Gleim Instrument Pilot Test Prep | High-volume question reps and analytics | Two short sets daily, then review only missed concepts | Stop at 80% focus; switch to oral-style speaking drills |
| ASA Prepware | Varied wording and quick practice sessions | One timed quiz to mirror pressure and pacing | Review explanations standing up to stay alert |
| FAA Instrument Flying Handbook (IFH) | Core concepts and scan technique | Read one topic, then teach it back in plain English | Write a 3-sentence summary to prevent “page-turn hypnosis” |
| FAA Instrument Procedures Handbook (IPH) | Approach procedures, holds, and real-world flow | Pair with plate review; talk through entries and missed steps | Do one full brief like the instrument pilot oral, start to finish |
| AIM (Aeronautical Information Manual) | Standards language and operational expectations | Pull exact sections that support your answers | Build a “most-used” list for quick recall under stress |
| CFII debrief + error log | Fixing technique drift before it becomes habit | Track repeat mistakes; bring one to each lesson | Label each mistake as knowledge, procedural, or workload |
When you put all these pieces together, the instrument checkride becomes less daunting. It evolves into a series of manageable sessions. Even when you feel overwhelmed, these strategies help you push through.
Scheduling and Registration
Scheduling feels like a reality check for our hopes. I never imagine something exciting when I think about scheduling a checkride. Instead, I see calendars, receipts, and forgotten emails.
The instrument checkride battle begins way before it officially starts. Keeping your mind ready for the oral part is key. If your morning is hectic, you’ll feel drained before you even begin.
A timeline might look good on paper but can consume your entire day. Imagine starting at 7:00 a.m., leaving by 8:00 a.m., followed by an hour’s drive. You then do a preflight and fly an hour to get to the examiner.
Weather adds another layer of complexity. An unexpected cloud layer could change your plans to an ILS approach. By 10:45 a.m., you’re busy confirming paperwork and hoping you appear as calm as you’re trying to feel.
| Time | Step | What to Prep Beforehand | How It Protects Your Focus |
|---|---|---|---|
| 7:00 a.m. | Start the day, quick review | Pack docs, headset, kneeboard the night before | Focuses you on flying, not finding things |
| 8:00 a.m. | Depart by car (1-hour drive) | Check address, parking, plan B route | Helps you start calm, not in a panic |
| 9:00 a.m. | Preflight and briefing | Review NOTAMs, TAFs, backups, fuel plan | Limits unexpected issues before you even taxi |
| 9:45 a.m. | Flight to home field (about 1 hour) | Prepare for an ILS for low ceilings | Makes bad weather manageable, not alarming |
| 10:45 a.m. | Check-in and document validation | Have ID, paperwork, endorsements, medical ready | Keeps paperwork from zapping your energy |
Registration might seem dull but it’s crucial. It should be as predictable as a TV show rerun. Any delay, like looking for endorsements, creates awkwardness fast.
Splitting the day could be a smart move. Long days can end in failure due to exhaustion. Fatigue is tricky and won’t care about your study efforts.
Thinking this way for an instrument checkride is just smart planning. It means managing your workload, tiredness, and resisting the urge to overdo it. Planning with extra time, for weather and energy, helps you show your best self to the examiner.
Study Plans and Sample Timelines
I’m sure you’re busy with work and life. Yet, this guide isn’t about extreme measures. A good IFR checkride study plan involves brief, fly, debrief, and repeat. These steps are short and effective.
The aim is to prepare for a lengthy oral exam. This should involve 6–7 hours of intense thinking. You should do the flight test later in the day. That’s when you’re more tired and find crosswinds challenging.
When preparing for the instrument test, I focus on the tough parts first. Issues in these areas can lead to bigger mistakes. An example is leading turns incorrectly due to a poor understanding of intercepts.
Keep each study session short to remain focused. Follow up with a quick review. Discuss what went wrong, why, and what you’ll do differently next. This routine is crucial for the checkride, as it shows the examiner your problem-solving skills.
- Brief (10–15 min): focus on one procedure, risk, and contingency.
- Work (30–45 min): practice approach flows, holds, intercepts, and missed approach strategies.
- Debrief (5–10 min): identify one improvement and one key point to remember.
Managing your energy is vital. It’s about planning sleep, meals, and breaks effectively. Treat downtime as essential as any task.
If you start your training flight at 17:30, you might feel tired. This can affect your performance, especially during landings. Windy conditions can make this worse. It’s best to expect this and have a plan rather than getting upset.
| Timeline | Weekday plan (working professional) | Weekend plan | Focus target | Practical test tips to bake in |
|---|---|---|---|---|
| Week 1 | 4 nights: 45 minutes each (regs, weather, IFR altitudes, lost comms) | 1 block: 2 hours (approach brief practice + plate reading) | Enhance memory and confidence | Explain topics aloud, then condense them into a single sentence. |
| Week 2 | 3 nights: 60 minutes (holds, intercepts, course tracking, timing) | 1 flight or sim: 1.5–2.0 hours (holds + one approach + missed) | Prevent small mistakes from escalating | Create a list of cues for avoiding errors: monitor altitude, flight path, and power adjustments. |
| Week 3 | 4 nights: 45 minutes (approach flows, brief formats, missed approach logic) | 2 flights or sim sessions: 2 hours each (two approaches per session) | Automate procedures under stress | Reflect briefly after each approach on unexpected issues and improvements. |
| Week 4 | 2 nights: 60 minutes (oral “mock blocks” with breaks) | Mock checkride day: 6–7 hours total effort (oral segments + late-day flight) | Show you can think clearly when tired | Bring snacks, drink water early, and relax before dealing with challenging conditions. |
Treat this plan as flexible, not fixed. If you struggle with a topic, practice it more rather than feeling guilty. Incorporate real-flight tips into your study for a smoother experience: maintain steady energy and focus, and make consistent decisions, especially on long days.
If you prepare correctly, the written test will seem like a stepping stone, not a barrier. When the study plan works, you’ll be more comfortable during the checkride, even in tough conditions.
Practice Test Strategies
IFR written practice tests are more than just studying. They make you think like the test itself. However, seeking only correct answers can mislead you. It builds fragile confidence that may crumble with unusual questions.
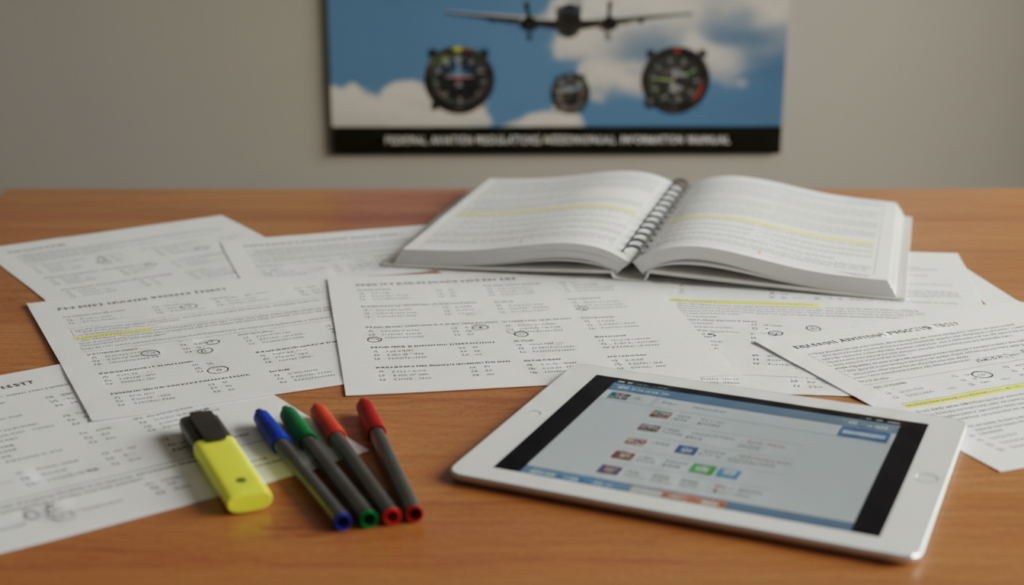
I approach practice sessions as though they are mini cross-exams. I read the question twice and underline what it wants. Then, I speak out what it’s actually asking. This verbal action prevents falling into traps by recognizing patterns. It’s crucial, especially when the oral exam demands precise and calm responses.
Endurance is something you build. Practice with longer sessions, take fewer breaks, and don’t distract yourself. This way, you’ll stay alert even as fatigue sets in. So, the checkride won’t feel like an unexpected, overwhelming task.
Even the best preparation can stumble on language. A single careless phrase can ruin much effort. It’s a real risk. To avoid this, I practice answering as if every word will be reviewed—carefully, safely, and plainly, using tips from instrument rating difficulty notes.
- Say the rule, then apply it: “For lost comms, AVE F and MEA” before you explain how it works.
- Force a paraphrase: put the question in your own words before solving it.
- Explain one wrong option: choose an incorrect answer and discuss why it doesn’t work.
- Track weak areas by theme: focus on alternates, holds, weather products, approach plates, regs.
Missing a question isn’t just about the topic. It’s about understanding why you missed it. Was it quick reading, chart confusion, misunderstanding measurements, or not knowing rules? This approach turns tests into a tool for learning, not just a quiz.
- Run a timed set of 20 questions without interruptions.
- After a mistake, come up with a clearer rule.
- Do another set, focusing on your two weakest areas.
- End with five verbal responses, as practice for the oral exam.
| Practice move | What it builds | How to run it | Common self-sabotage to avoid |
|---|---|---|---|
| Two-pass reading (stem, then choices) | Accuracy under time pressure | Read the question, predict the answer, then check options | Choosing a familiar option too quickly |
| Verbal precision drill | Clean phrasing for the oral exam | State your answer briefly, then support it | Talking too much and confusing yourself |
| Endurance blocks | Long-term decision-making energy | Two 30-minute sets, timed, with a short break between | Breaking concentration by checking answers halfway through |
| Error-type log | Quicker learning every study hour | Mark your mistakes as concept, reading, calculation, or chart errors | Blaming the question rather than improving |
| Scenario chaining | Applying knowledge to the checkride | Develop a mini flight plan from a question | Memorizing facts without practicing decisions |
It’s not just about test tricks. This is about precision in crucial moments. IFR written tests teach you to stay cool, choose wisely, and back up your answers. The checkride and oral exam test your words and decisions, not just your intentions.
Test Day Tips
Every test day tells a story, planned or not. I like beginning early, driving calmly, and doing a preflight like it’s a checklist, not a suspense movie. For instrument checkride prep, I start with the simple tasks: parking, paperwork, and checking the weather and NOTAMs.
When moving the airplane, think of it as a warm-up, not the key event. A 1,000-foot broken layer can change an “easy day” into a challenging one, so allow extra time in your plan. These test tips might sound plain, but they prevent a rush when things get tight.
Meeting your instrument examiner involves checking your ID, documents, and other admin tasks before the oral exam begins. I keep endorsements, my medical, and photo ID in one place. This stops me from panicking while I discuss flying topics.
| Phase | What I Plan | What Can Go Sideways | Reset Move |
|---|---|---|---|
| Early start + drive | Leave early, eat, hydrate, arrive with time | Traffic, low sleep, caffeine spike | Two-minute pause before walking in; slow breathing |
| Preflight + reposition | Deliberate preflight, brief taxi plan, simple mental script | Gusts, delayed clearance, 1,000-foot broken surprises | One deep breath at hold short; reset scan |
| Paperwork + oral | Docs ready, notes minimal, speak in short steps | Rambling, rushing, “blanking” on basics | Answer, then stop; let silence work for you |
| Flight block (~1.4 hrs) | Maneuvers in a clean order, stable avionics setup | Task pile-up, missed callouts, fixation | Re-center between items: aviate, navigate, communicate |
| Takeoffs + landings late day | Extra margin, stabilized approach, brief go-around plan | Fatigue, sloppy flare, crosswind frustration | Fresh start mindset after each landing |
Fatigue and anxiety are the main challenges. Fatigue appears late, just when you need to shine. Anxiety grows from a tough landing, wanting to spoil the whole day.
I don’t let problems define the day. Each task is a new start: after a mistake, I breathe, loosen my grip, and double-check my next move. Then, I let it go.
In the cockpit, keep things straightforward. Looking for test tips? Focus on a tidy setup: plan your approach, check your nav settings, and follow the plan. Make sure to explain what you’re doing openly. It helps the examiner understand your actions.
Above all, guard your focus. The instrument checkride is a marathon, with late activities testing your limits. Take breaks, drink water, and allow yourself to reset. That’s how professionals act, not like they’re in a movie.
Debunking Myths About “Tricky” Questions
People say “tricky” questions are like a Marvel villain with a clipboard. I know why. Stress loves to make things seem bigger. But in an IFR checkride, the “gotchas” aren’t mind games. They’re basic ideas showing up when you’re under pressure.
There’s a myth I hear a lot. It’s about the examiner setting secret traps. The real trap? It’s often a sloppy way of thinking you’ve gotten used to. If you’re inconsistent in practicing, your weak spots will show. This is especially true when things speed up.
Think about setting up for an approach. Some pilots are taught a weird habit. They start right on the VOR, then make a sharp 120° turn to “make it work.” This strange way forces you to lead turns too early. Then, you lose track, and everything falls apart. Suddenly, it’s blamed on “tricky” questions, not the bad setup.
| Myth | What’s Really Happening | Better Frame |
|---|---|---|
| “The IFR checkride is full of gotchas.” | Weak IFR flows and half-memorized rules get exposed when workload spikes. | Precision under stress, not mind games. |
| “That approach failure was just ‘tricky’.” | A forced intercept or late correction creates chasing, then overcontrol. | Build a clean intercept plan and fly small corrections. |
| “Once the hard parts are done, I’m safe.” | Fatigue causes performance drift, and one careless phrase can change the task. | Manage energy, use standard calls, stay deliberate to the end. |
Here’s another myth. “If I get past the oral and maneuvers, I’ve made it.” That might be true in movies. There, the story ends when the hero lands. In real life, trouble can come late. It often shows up during takeoff and landing practice. That’s when fatigue makes a good performance go bad. And a single wrong phrase can shift what you’re asked to do.
Treating the instrument checkride like a long workday helps. Don’t quit thinking after a big event. The basics are still important. They’re even more crucial when you’re worn out. The “tricky” questions? They’re not tricks. They’re the same old standards, now coming at you on the go.
Next Steps After Passing
You step out after the instrument pilot oral, expecting the end credits to start. But they don’t. Instead, the clouds become the real test, always demanding perfection. After passing the IFR checkride, use the following days to improve, not just celebrate. Note down what didn’t go well and practice it soon.
Then, get into a regular practice routine. Try doing one or two approaches every week. Mix in some holds and missed approach procedures, even if you have to use a safety pilot while flying under the hood. Always keep your briefings and checklists concise and accurate. And avoid making up on-the-spot fixes when flying—they can lead to bad habits.
If you face a problem later, don’t drama over it. I’ve seen pilots bounce back quickly. Sometimes, a short re-check is all it takes to correct a mistake. The instrument checkride is tough, but not unfair. View any hurdles as feedback, not as your fate.
Remember, the instrument rating is more like a subscription than a trophy. It needs regular practice to maintain. Schedule a flight each month for practice. Include real-life situations in your practice sessions and stay familiar with your equipment. That way, your next check isn’t a challenge but just another normal flight day.