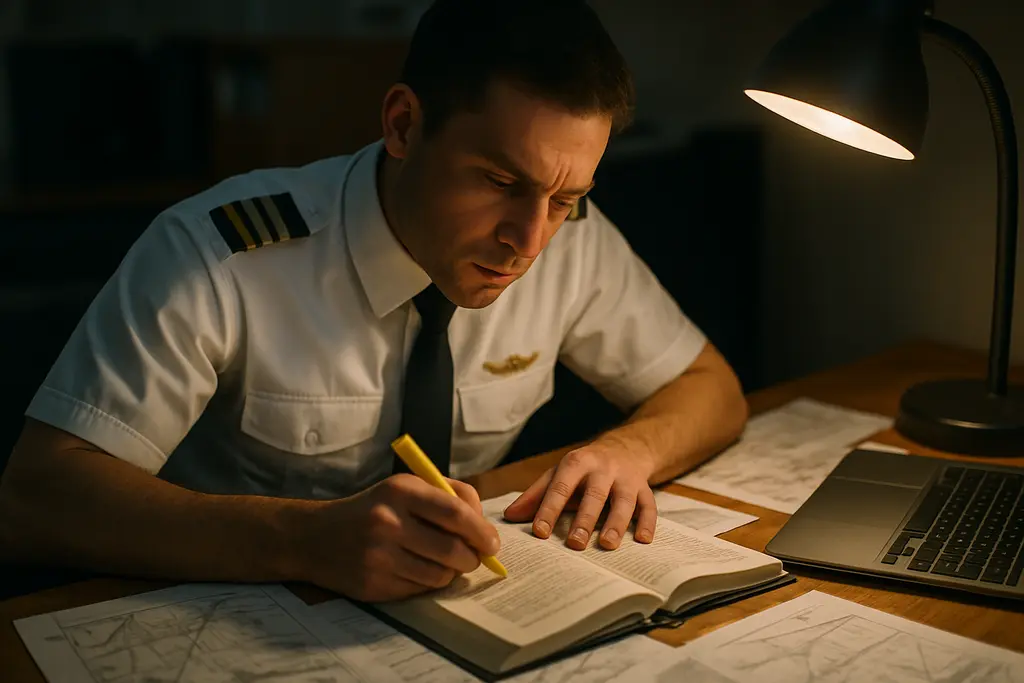
The moment you “turn to heading 270,” you face the truth. IFR training is not only tough—it tests your budget too. In the U.S., the cost for an instrument rating isn’t just a set price. It’s a continuous expense. Think aircraft rental, instructor fees, simulator time, test costs, and the inevitable “why is my avionics database out of date?” Each aspect adds to your bill like clockwork.
The FAA doesn’t name a specific price. Instead, it lists what you need to do. AOPA breaks it down: you must get 50 hours of flying cross-country as the pilot in command. This includes 10 hours in airplanes that are equipped for instrument flying. Plus, you need 40 hours of flying with either actual or simulated instrument conditions. And you need 15 hours of flying lessons specifically for instrument flying with a certified instructor.
Next, there’s the prep for the checkride. You must complete three hours of instrument training within two months before the test. Then there’s the long IFR flight—a trip of at least 250 nautical miles. It must be planned and flown using official airways or directions from air traffic control. During this flight, you must make an instrument landing at each airport. You also must complete three different types of approaches, such as ILS, VOR, and GPS.
The cost of IFR training adds up quickly, since you pay for each hour. Remember to include ground school in your budget. According to AOPA, you must either log training hours with a certified instructor or finish a home-study program. And, of course, you need official approvals for the knowledge and practical tests. It seems paperwork is the one area where no pilot can skip steps.
Typical IFR Training Cost Breakdown
An IFR training cost breakdown is more exciting than it sounds. It’s your flying adventure, detailed in expenses. The FAA suggests 40 hours of flying with instruments. You need at least 15 hours with a qualified teacher.
Divide your flight lessons into two main parts. The first part covers learning procedures like clearances and reading maps. The second part tests your skill under pressure.
Approaches are the big expense. Training for ILS and RNAV (GPS) approaches is costly. You’ll deal with precise guidelines and navigate complicated instructions.
The long cross-country flight is more than just pretty views. It’s a 250 nm journey requiring several different approaches. It’s like a tour of ILS, VOR, and GPS. Yes, this variety costs.
Realistic expectations are important. Prices vary between Canada and the U.S., but the basics are similar. This snapshot shows costs from $8,000 to $12,000. It includes around 40 hours in the air and some simulator time.
| Training bucket | What you’re really practicing | Why it affects cost |
|---|---|---|
| Core IFR procedures lessons | Clearances, departures, enroute tracking, arrivals, holds, cockpit flow | High instructor time early on; repetition builds speed and lowers “extra” hours later |
| Approach variety block | ILS approach training, VOR/LOC non-precision work, RNAV (GPS) approaches including LPV concepts | Different guidance types and minima mean more briefings, more setup, and more debrief |
| Simulated vs. actual instrument time | Hood work, simulator sessions, scan discipline, workload management | Sim time can be cheaper; actual weather adds realism but can add delays and reschedules |
| 250 nm IFR cross-country day | Full flight planning, real-time reroutes, approach at each stop, missed approach execution | Longer flight time plus multiple approaches concentrates costs into one “big day” |
| Checkride prep sprint | Polish weak areas, meet the 3-hours-in-2-months requirement, tighten tolerances | Often a short, intense block; avionics familiarity can shrink or stretch this phase |
For a simple view, think of it like this: your gear shapes your workload. Basic navigation takes time. Advanced panels might speed things up. But both ways, you’ll spend lots of time planning approaches, setting up your gear, and making crucial decisions. It’s about mastering the plane, not the other way around.
Flight School vs. Independent Instructors
Training ecosystems can be as varied as political systems. Both claim efficiency, both involve paperwork, and success often hinges on leadership. You might pick from a structured school, a local instructor, or an intense program.
Part 141 instrument training feels like a structured journey. It offers clear steps, check-ins, and a set pace to prevent delays. But, you’ll need to follow the rules and deal with scheduled lessons and possible repeats.

Choosing an independent CFII offers flexibility. They adapt to your needs, pinpointing areas like tricky holds. The risk? If they get swamped, your progress stalls, leading to costly setbacks.
The accelerated course is like a quick, tempting offer from a streaming service. According to AOPA, these often wrap up in 10 to 12 days. Success requires your full availability and readiness. Some programs use your plane, others need you to travel, affecting the cost.
| Training path | What it feels like day to day | Cost drivers that sneak up | Best fit when your goal is… |
|---|---|---|---|
| Part 141 instrument training | Structured syllabus, stage checks, predictable milestones | Aircraft and instructor availability, repeat flights from schedule gaps, check fees | Career progression and clean documentation |
| independent CFII | Flexible pacing, personal coaching, quick pivots to fix habits | Stop-and-go training decay, limited backup instructors, weather-driven reschedules | “Good to have in your pocket” with a custom plan |
| accelerated instrument rating course | High frequency flying, tight feedback loops, little downtime | Travel and lodging, intensive aircraft time, upfront prep needs | Productivity for business or personal flying on a deadline |
No matter what you choose, the FAA’s rules must be followed. You need enough flight and ground time, plus proper endorsements. The key isn’t finding the “best” system. It’s about picking one that gets you in the air enough to grow your skills.
Cost-Saving Tips: Simulators, Study Groups, Apps
The cheapest IFR hour is the one you don’t spend $200+ on while trying to remember last Tuesday’s lesson. So, I’m here to tell you simulators are almost a miracle. But really, it’s just smart thinking.
AOPA says this is the way to save your budget from yelling at you. For your instrument rating, you can do up to 30 hours in a simulator or flight training device if it’s under Part 142. If not, you get up to 20 hours. And you can log up to 10 hours on an aviation training device.
The strategy is to practice the basics at home. Then use the airplane for what it teaches best, like holds and approaches. If you end a simulator session feeling bored, that’s great. It means you’re ready to fly without making mistakes.
FSA Learning Flight says IFR training is like a dance. It covers SIDs, airways, STARs, and ILS approaches. Practicing these repeatedly makes you faster and stops mistakes from surprising you.
Practicing clearances often helps too. IFR clearances use CRAFT, and approaches use PTAC. Be careful: approach clearances can trip you up if you’re slow. Start your turn as you read it back, or you might miss your mark.
| Budget Move | Where It Fits | What to Rehearse | How It Cuts Paid Aircraft Time |
|---|---|---|---|
| Instrument flight simulator sessions | Early training blocks | Holds, intercept angles, scan discipline, PTAC readbacks | Fewer “stop and re-brief” minutes once the Hobbs is running |
| Flight training device (FTD) | Mid-course polish | SIDs/STARs sequencing, ILS approach flows, missed approach setup | Approaches become repeatable runs, not expensive improvisation |
| IFR training at home with study partners | Between lessons | Chair-flying checklists, callouts, CRAFT copying, briefing habits | Less re-teaching on the ground, more flying in the air |
| Apps and EFB practice | Daily “spare minutes” time | Procedure review, plates, frequencies, route edits, alternates | Cleaner cockpit workflow, fewer repeated lessons for basic tasks |
Study groups might seem too good to be true, but they’re not. One person pretends to be ATC, another follows the checklist, and everyone practices out loud. Talking it out makes doing it easier.
Apps are also a big help. They make practice easy. Get used to pulling up your flight plans and walking through them until it’s second nature. This way, your instructor can focus on improving your skills rather than teaching basics.
Financial Aid and Scholarships
Forget the idea of a magical grant fairy. Money for your instrument rating is more likely to come if you have a solid plan, a clear timeline, and a story that convinces the person with the funds. This is where scholarships for instrument rating and funding for aviation training meet real decisions, not just hopes.
Begin by understanding the options. AOPA details the paths: schools under Part 141, independent instructors, or fast 10–12 day programs. Each choice impacts how and when you pay, including any unexpected costs.
| Training path | How payments often work | What it changes for IFR training funding | Common extra costs to plan for |
|---|---|---|---|
| Part 141 program | Upfront deposits, staged payments, or term-based billing | Cleaner paperwork and structure can help with aviation training financing that wants a syllabus and milestones | Stage checks, fixed scheduling, school fees, and more formal ground blocks |
| Local independent instructor (Part 61) | Pay-as-you-go per lesson, flexible pace | Great for cash flow, but IFR training funding may need clearer documentation of progress | More self-managed study time, variable aircraft availability, and inconsistent sim access |
| Accelerated 10–12 day course | Larger upfront payment, travel-heavy logistics | Fast outcomes can look attractive for reimbursement, but scholarships may scrutinize readiness and completion risk | Travel, lodging, rental cars, weather delays, and higher daily flying tempo |
Then I share a secret that scholarship committees love: I tell them why I want the rating. AOPA says reasons can be straightforward—like improving skills, advancing a career, or flying more efficiently for work or pleasure. This reason is crucial. It’s not just filler; it’s true and useful for strengthening your case for scholarships or reimbursements.
Next, I plan for crucial expenses that keep pilots safe. Instrument flight lessons aren’t just about flying. They include ground lessons with endorsed instructors or detailed home study, and time needed to meet required flying hours. If the plan ignores these, it misses out on important learning opportunities.
- Ground and knowledge prep: instructor sessions, online classes, books, and exams
- Training momentum: lessons frequent enough to prevent costly relearning
- Documentation: keeping receipts, logbooks, and a timeline to support funding applications
Finally, I align funding with my training path. When seeking IFR funding, I look for programs that value clear progress, like passing tests, scheduling the final exam, and setting a realistic end date. I also find support that fits my schedule. This way, my finances start to align with my goals.
Hidden Expenses
IFR training hidden costs hit you unexpectedly, much like a plot twist in a TV show finale. You think all you need is to pay for flight time and an instructor. Then you find out the airplane needs special equipment for true IFR training. This includes GNSS for RNAV approaches and WAAS for LPV.
At first, “current databases” seems like a minor detail. Then you learn about avionics database updates. These aren’t optional for flying modern approaches. They can also make rental costs go up when the school keeps their equipment up to date. You’ll find these costs piling up, whether you’re amazed by the technology or just focused on your flight.
Keeping charts updated is another stealthy cost. You need the latest IFR procedures charts to fly correctly. Saying “I saw it on an old PDF” won’t cut it. Going digital means swapping printing costs for app subscriptions and worrying about your device’s battery life.
Setting up your Electronic Flight Bag (EFB) feels like navigating a maze of rules. Having a tablet with Garmin Pilot or ForeFlight is awesome. But, it also needs a sturdy mount and to fit smoothly into your cockpit routine. A loose tablet becomes useless just when you need it most.
There’s a bunch of admin and compliance costs you can’t avoid. The focus on safety means needing backup systems for navigation. Planes equipped with these systems cost more to rent. These planes know their value and come with a higher price tag.
Skipping training sessions makes checkride prep more expensive. If you miss lessons, you end up paying again to relearn what you forgot. Repetition helps you learn but it can really inflate your costs.
| Expense that sneaks in | Why it pops up | How it hits your budget |
|---|---|---|
| Avionics database updates | RNAV (GNSS) and WAAS/LPV flying depends on current navigation data | Recurring subscription costs or higher IFR-equipped rental rates |
| IFR procedures charts | Enroute, terminal, and approach information must stay current to match real-world ops | Monthly app fees, chart bundles, or last-minute purchases before a stage check |
| EFB setup | Tablets help, but they need a secure mount, power plan, and a cockpit flow that won’t distract | Mounts, cables, backup battery, and time spent dialing in settings |
| Redundancy in training aircraft | IFR training and testing culture leans on having enough nav capability to continue after a failure | Pricier aircraft options and fewer “cheap” rentals that qualify |
| Instrument rating checkride prep | Inconsistent training creates skill fade, and polish takes time | Extra dual hours, more simulator time, and additional mock checkrides |
To avoid surprises, plan for these costs as if they were fixed. IFR training’s hidden costs aren’t swayed by hope. They hinge on staying up-to-date and having functional equipment during intense flying moments.
How to Budget for IFR
Planning your budget for IFR training is crucial. It’s not something you can just improvise. Think of it like a strategic plan in a war room. The weather, air traffic control (ATC), and your own schedule will always try to throw you off.
Start by understanding the bare minimums and the realistic goals. Under the regulations (14 CFR 61.65), you need at least 40 hours of flight in the clouds or a simulator. This includes 15 hours with an instructor and a long cross-country flight that meets certain criteria. This sets the base level for your training.

Scheduling with your IFR instructor is the next step. Always book multiple sessions in advance rather than picking dates randomly. This keeps you moving forward without forgetting what you learned last time. It’s like keeping momentum to avoid paying to relearn what you already know.
Using the simulator wisely is key. Spend time in it practicing the basics until they’re second nature. Save the real plane for practicing with air traffic control, managing the cockpit in busy situations, and flying in less-than-ideal conditions.
Build your IFR procedures training carefully. Start with the basics and add one thing at a time, like building a playlist of skills. Include communication practices to keep your radio work sharp. It’s important to cover everything, from pre-flight planning to dealing with emergencies.
| Budget Category | What You’re Buying | Typical Place to Do It | Why It Saves Money | What to Track Each Week |
|---|---|---|---|---|
| Core hours to meet 61.65 | 40 hours instrument time + 15 hours with an authorized instructor | Mix of aircraft and simulator (within device limits) | Prevents “almost there” spending that drags for months | Instrument hours logged, instructor hours logged, gaps to minimums |
| Procedure reps | Holds, course intercepts, approach flows, missed approach routines | ATD or simulator session | High repetition at lower hourly cost, less fatigue | Reps completed, error rate, time to stabilize on final |
| ATC integration | Clearances, reroutes, real pacing, workload management | Aircraft time in the system | Reduces surprise costs right before the checkride | Number of clearances copied cleanly, frequency changes missed, task saturation notes |
| Cross-country requirement | 250 nm IFR cross-country with approaches at each airport and three approach types | Aircraft (plan for alternates and weather pivots) | Combines multiple requirements into one efficient “mission” | Route options, forecast risk, approach types completed, diversion plan used or not |
| Checkride readiness buffer | Mock oral, scenario flights, emergency drills | Instructor + aircraft and/or simulator | Cheaper than a retest, and kinder to your nerves | Weak areas list, oral topics missed, standards met consistently |
Finally, keep track of your progress carefully. If things don’t go as planned one week, adjust immediately. Never just assume you’ll catch up later. Stick to the plan for using your time and resources wisely, and protect your instructor time like it’s the most valuable thing.
When to Invest in Your Training
The best time to start IFR training isn’t about the calendar. It’s about your “why.” Do you want backup ability? Is it for your career? Or to fly more during busy travel days? Think of your reason as a preflight check. Skip it, and you might waste money like experts guessing on TV.
Next, are you ready for instrument flight lessons? Can you fly often to keep skills fresh? You need to do holds, intercepts, and approach briefings a lot. IFR skills fade if you don’t practice. Relearning them costs a lot.
If you need more cross-country PIC hours, it’s important. You need 50 hours for the rating, including 10 in airplanes for instrument-airplane. Your budget for this also includes cross-country flying. Make those hours count by focusing on route planning, weather decisions, and working with ATC. Don’t just fly for fun at 5,500 feet.
Having a good IFR instructor matters, too. When bad weather and maintenance issues happen, you might have to reschedule a lot. If you can only see your CFII every other week, you might end up paying more. You pay once to learn and again to remember.
Accelerated IFR training is an option. According to AOPA, you can finish in 10–12 days. But, you need to keep your schedule free, come prepared, and handle the fast pace. Don’t burn out like a phone in the sun.
Then, think about the checkride. You need 3 hours of training in the two months before the test. Start too early, and you’ll pay more for refreshers. It’s best to get closer to the test so you’re fine-tuning, not starting from scratch.
| Timing trigger | What it says about your readiness | Smart move with your money and schedule |
|---|---|---|
| You can fly 2–3 times per week for 6–10 weeks | Solid instrument flight lessons readiness and lower skill fade | Book a consistent CFII block and add a simulator session for procedure reps |
| You’re short on cross-country PIC hours | Prerequisites will bottleneck the rating if ignored | Plan efficient XC routes that build hours while practicing weather reads and ATC cadence |
| IFR instructor availability is limited in your area | Stop-and-start training risk is high | Reserve dates in advance, keep backup days, and align ground study to each flight |
| You can take 10–12 straight days off and focus | You may be a fit for accelerated IFR training intensity | Arrive with written prep done and a plan for rest, debriefs, and weather delays |
| Your checkride window is within the next 2 months | You can meet the 3-hour recent-training requirement without paying twice | Shift spending toward polish: approaches, partial panel work, and mock checkrides |
So, when is the best time to start IFR training? When your goal is clear, you can protect your time, and training is consistent. That’s the best time, even if the weather is unpredictable.
Value vs. Upfront Cost
Training might seem expensive at first. But the worth of IFR training goes beyond simple costs. According to AOPA, it’s invaluable in uncertain situations, for advancing careers, or enhancing efficiency in both personal and business flights. These benefits shine when the weather turns bad and you must stick to your plan.
The real value of training is not just a concept. It’s seen in being skilled with IFR procedures. A critical practice AOPA highlights is the 250 nm cross-country flight. It includes ATC-guided routes and various approaches at different airports. This practice is crucial, preparing you for challenging flights.
IFR training is about managing detailed flight paths and communicating with ATC. Using simulators helps perfect these skills cost-effectively. Yet, the essence of IFR mastery lies in the instructor’s quality. A great instructor transforms basic rules into practical wisdom.
Transport Canada emphasizes a professional level of readiness. This includes understanding the autopilot and FMS, expecting manual approaches, and dealing with emergencies. Despite the cost, lacking an IFR rating can lead to unnecessary delays or risks. Investing in a rating enhances safety and decision-making abilities, making it invaluable in aviation.