Most pilots dream of getting their instrument rating. Then, bad weather or fast-talking ATC can make you rethink. Suddenly, flying visually feels just right.
This guide will help you understand everything about the instrument rating. It covers what it is, the training process, and how to pass the FAA exam. All without giving up your weekends or going crazy.
The plan here is simple and direct. The goal: get that rating. The method: follow a straightforward training route. You will prepare for your checkride and practice real-world IFR flying. Yes, it’s tough. But it’s not a mystery. In the end, the flying freedom you gain is absolutely worth it.
And we’re talking about the keyword “reality” right from the start. We don’t hide important stuff because that’s not helpful. You’ll find terms like Main Keyword and IMRaD early on. That’s because that’s what people look for. And it’s how busy readers find what they need.
If you’re looking for clear guidance, you’re in the right place. I made this guide to be easy to understand and to the point. That way, you can quickly figure out if this is the right guide to help you get your instrument rating.
What is an Instrument Rating?
Let’s start with what an instrument rating is. It’s a special permission given by the FAA. It allows someone to fly planes using only cockpit instruments and instructions from air traffic control. This method is used when you can’t rely on seeing outside.
This rating lets pilots fly in almost any weather condition, like in clouds or when it’s hard to see. You will soon learn terms like IFR and VFR, which might seem like a different language. That’s why training is essential.
An instrument rating involves learning a lot of rules and how to stick to them. Pilots learn to keep the plane steady, follow directions, and how to land carefully using only instruments. They also must keep up with their training to stay allowed to fly this way.
| Key terms | What they mean in plain language | Why they matter during IFR flight |
|---|---|---|
| Instrument Flight Rules (IFR) | Flying by instruments and ATC procedures instead of visual reference | Keeps separation and order when weather or visibility is poor |
| Visual Flight Rules (VFR) | Flying by looking outside and staying clear of clouds | Sets the baseline for what you can’t rely on in instrument conditions |
| ATC clearance | Permission and instructions for route, altitude, and procedures | Creates a predictable plan you’re expected to follow exactly |
| Instrument approach | A published path to land using navigation signals and step-by-step fixes | Provides a structured way to get from the clouds to the runway environment |
| Minimums | The lowest altitude/visibility allowed before you must see required cues | Forces a decision: land, go missed, or try something smarter |
Here’s a quick summary: an instrument rating is a certification for pilots. It allows them to fly under IFR with certain rules and coordination. The terms mentioned are the basics of this system. This guide will help if you’re into strict procedures. If it sounds tough, it kinda is.
Why IFR Matters
I see Main Keyword as a passport, not just a prize. Its goals are clear: fly with flexibility, make smarter choices, and avoid delays by weather. It’s practical, not just about looking cool.
IFR is crucial because it brings order in bad weather or poor visibility. Terms like approach plates and ATC clearances are key. They’re not just facts but your strategy for safe flying when you can’t see outside.
Let me explain without fancy talk: IFR won’t make storms or risk disappear. But, it sharpens your planning—everything from fuel checks to emergency options improves. It’s about accurate planning over guesswork.
Choosing IFR comes down to facing risks wisely. Do you cancel flights for bad weather, or train to handle it with confidence? Main Keyword helps you build a smoother process, learning one step at a time.
| What changes with IFR | What you rely on | What it affects in real life |
|---|---|---|
| Navigation shifts from “outside references” to instruments | Attitude indicator, altimeter, heading indicator, GPS | Fewer surprises when haze, rain, or night limits the view |
| Communication becomes structured | Clearances, readbacks, standard phraseology | Less confusion in busy airspace and on complex arrivals |
| Planning gets rule-driven | Weather reports, alternates, minimums, fuel requirements | Stronger go/no-go thinking and fewer last-minute scrambles |
| Workload rises, then evens out with practice | Checklists, scan discipline, cockpit organization | More stable performance when things get time-compressed |
If you’re unsure, remember the goal: building reliable skills, not just for show. You’ll see Related Keywords again because they’re essential when it really matters. Remember, IFR teaches controlled flying, urging smart decisions over shortcuts.
Prerequisites for Instrument Training
Before you go after the Main Keyword, start with the basics: show you’re prepared. It’s like making sure a movie script is tight—no extra fluff, only the essentials. These details outline what comes next.
I’ll keep things simple, skipping complex terms that don’t help. We’ll focus on basics: logbook, medical, knowledge, and a realistic plan.
Take a look at this checklist to see if you’re at the starting line. Not meeting all items? You’re not behind. You’re just not ready yet.
- Pilot certificate: Have at least a private pilot certificate. This way, instrument training adds to your skills in controlling a real aircraft.
- Medical status: Your FAA medical certificate needs to be up-to-date with how you’ll fly. Renew it before it expires to avoid issues.
- English proficiency: Understandable spoken English for radio communication and clear written English for tests are needed. It’s essential for safety, not just a bonus.
- Logbook discipline: Keep your logbook clear, up-to-date, and backed-up. A messy logbook can delay your training.
- Time and budget reality: Set a schedule you can stick to. Regular progress is better than bursts of effort with breaks.
If you prefer seeing everything at once, here’s that checklist in a clean format. Nothing is missed or suggested—it’s all laid out.
| Prerequisite | What it means in plain English | What to confirm before lesson one |
|---|---|---|
| Certificate eligibility | Make sure you have the pilot privileges needed to start instrument training. | Bring your pilot certificate and check it matches the aircraft you’ll be using. |
| FAA medical currency | Your medical should be valid for the flying you have planned. | Look at the expiration date and any notes on the certificate. |
| Record readiness | Ensure your training history is easy to read and trustworthy. | Update your flight totals, endorsements, and keep digital copies. |
| Study materials | Have a solid plan for learning the needed knowledge. | Choose a ground school method and stick to your test prep plan. |
| Scheduling plan | Train often enough so your skills stay sharp. | Plan your lessons and study times each week. |
The Main Keyword is your target, but success comes from good habits. By following the checklist and keeping details straight, you’ll be more focused on flying. This way, you spend less time confused and more time mastering the skies.
And I’ll continue to skip the jargon whenever I can. After all, a page full of acronyms feels like trying to guess a complicated password.
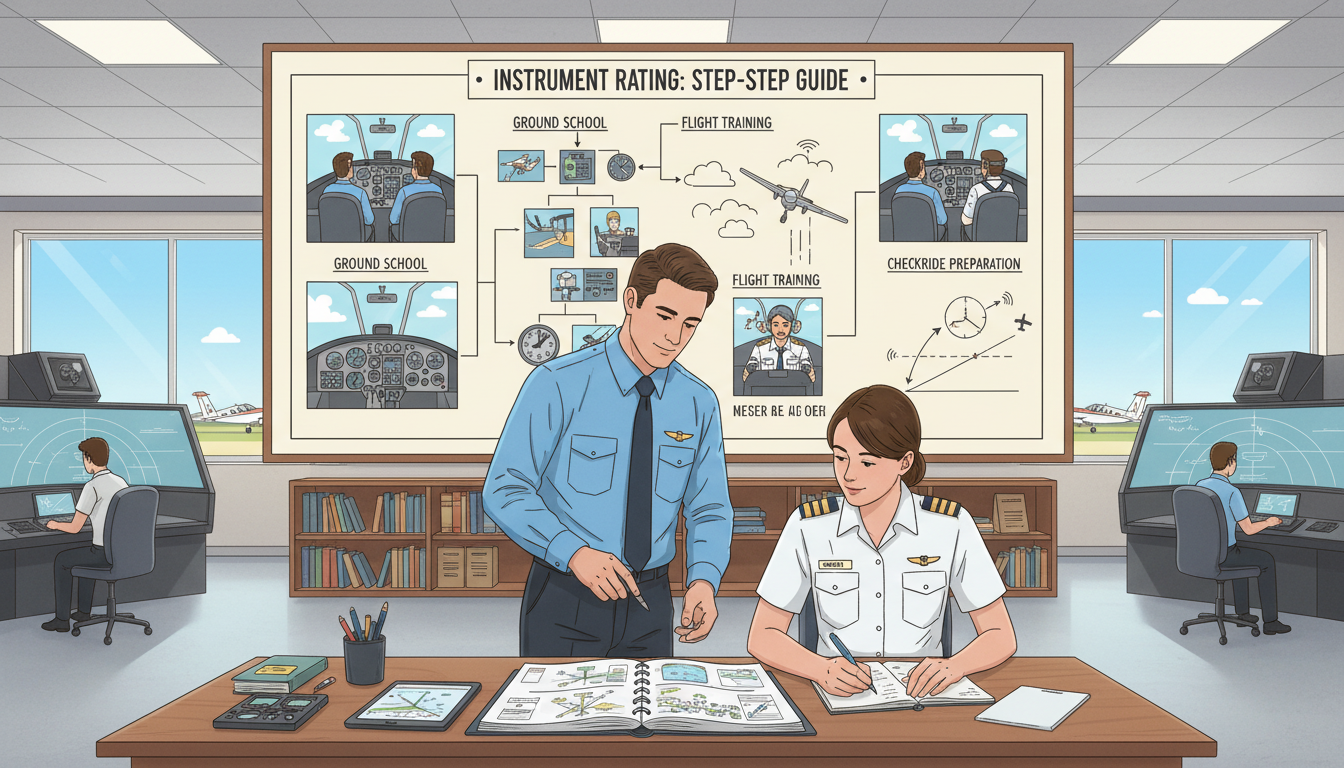
Overview of the IFR Training Process
I like an IFR plan the way I like a good newsroom brief: tight, clear, and without chaos. The Main Keyword helps you start, but the Related Keywords keep you on track during busy times. A structured plan is better than going with the flow in flying.
See training as a step-by-step journey. It’s not like writing a science paper while flying. Instead, your mind needs order when dealing with busy radios. First, understand your goal, how you currently do things, and what a successful IFR flight means to your instructor.
Now we focus on methods, described as a series of steps. This part is about improving your control and learning IFR rules without unnecessary pep talks. You’ll get better at scans, clearances, and practice crucial maneuvers. After mastering these, approaches and missed approaches will become second nature.
The structure makes recalling tough details easier when stressed. Lessons link to each other for smoother recall. This coherence, like in well-crafted briefs, turns complex tasks into manageable ones.
| Training Phase | What You Focus On | How It Connects to the Next Step | Typical Proof You’re Ready to Move On |
|---|---|---|---|
| Background / Objective | Define goals, set standards, align on expectations | Creates a shared plan so lessons don’t drift | You can explain your targets and personal weak spots clearly |
| Core Methods | Scan, aircraft control, radio work, IFR procedures | Builds the habits that make approaches manageable | You maintain headings/altitudes while handling basic comms |
| Procedure Integration | Holds, intercepts, course tracking, approach setup | Turns isolated skills into repeatable flows | You brief and set up an approach without losing the airplane |
| Scenario Practice | Realistic routing, workload management, errors and fixes | Preps you for checkride-style decision chains | You catch small mistakes early and correct without drama |
| Consistency Check | Stable performance across different days and conditions | Reinforces the “key message” of repeatable IFR discipline | Your instructor sees the same quality twice in a row |
Ensure each lesson has one clear point to remember. The Main Keyword sets the goal, with Related Keywords for details. With a systematic approach, progress is clear. Aim for consistency from start to finish. No sudden jumps, just steady steps forward.
Ground School and Written Exam
Ground school turns the concept of instrument rating into a real system. It’s like writing a serious paper. First, create the draft and then add the title and abstract. First, you build your knowledge base. Don’t rely on shortcuts to ace anything.
My study method includes a trick from academic writing. It focuses on efficient use of time, just like writing a tight abstract. Use every minute well, focusing on rules, concepts, and scenarios. Make sure you can explain things clearly under pressure.
Next, I create my own set of keywords, like in a paper’s abstract. In aviation, these are the topics that often catch you off guard. Topics like IFR charts and weather interpretation are crucial. Think of them as related keywords that keep coming back.
I also use a simple form of database logic in my studies. It helps me note what I missed and why. I figure out what hint would have helped me remember. This makes my knowledge on main topics practical, not just familiar.
| Ground School Focus | How I Keep It Tight | What It Prevents |
|---|---|---|
| Weather services, reports, and forecasts | One-page summaries plus 10 mixed questions per session | Confusing METAR trends with TAF intent when time is short |
| IFR charts and approach procedures | Verbal “brief” of a plate in plain English, then answer questions | Missing a stepdown fix or misreading minima formatting |
| Regulations and IFR currency | Flash recall: rule, trigger, and a quick example scenario | Careless rule swaps that cost easy points |
| Holding and navigation | Draw it once, say it once, then solve without looking | Overthinking entries and burning time on simple geometry |
I keep my study discipline strict because even small mistakes can have big consequences. Think of them like typos in abstracts. They show carelessness. In tests, it appears as overconfidence. I focus on clear patterns in my notes: what happened, why it happened, and how to improve.
I don’t believe in last-minute heroics or cramming myths. It’s all about clear recall, precise language, and repetition. It may feel boring at first. But soon, it feels as natural as autopilot.
Simulator, Hood, and Real-World IFR Practice
This training part is like a recipe. It tells you what to do, where, and why it’s important. We use hands-on, repeatable methods. If a school makes big promises, I focus on what I can see and measure, not just a good feeling.

Begin with a simulator or an FAA-approved device. The practice setting stays the same as the difficulty increases. Here, skills like scanning, managing tasks, and checking instruments become second nature. It’s not about having fun. It’s about building reliable habits, like keeping the right headings and altitudes.
Then, practice with a hood in a real plane, where everything feels more real. With the hood, we focus on sharp techniques and clear outcomes. We practice things that resemble real approach control. Doing anything else is like doing exercise with a headset on.
Practicing IFR in the real world teaches you to deal with weather, keep up with air traffic control, and manage your focus. Training summaries guide you like abstracts of a study. Yet, you must look beyond advertising to the methods used: How complex was the route? Were mistakes noted? Was the debrief connected to our goals?
| Practice environment | What was done (methods) | What to watch (objective observation) | Why it matters (methods and outcomes) |
|---|---|---|---|
| Simulator | Instrument scan drills, partial-panel work, holds, timed turns, approach repeats | Deviation trends, workload spikes, button-push errors, scan breaks | High repetition builds procedure memory without weather or traffic pressure |
| Hood in the aircraft | Intercepts, tracking, altitude changes, approach setup, missed approach flows | Trim discipline, radio timing, pitch/power control, briefing quality | Adds motion, real avionics, and real radio rhythm to the same core tasks |
| Real-world IFR | Clearances, reroutes, holds-in-lieu, actual approaches, real missed decisions | Decision points, weather checks, ATC compliance, fatigue signals | Tests whether the practice stays consistent with main text under real constraints |
I stick to a simple routine: brief, fly, debrief, and repeat with a twist. This makes sure skills stay relevant, not just for show. It keeps everything focused and honest. We choose each step of practice with a clear purpose.
Costs and Timeline
Talking about money in aviation is like discussing the weather at Oshkosh: everyone has a different view. Yet, the key point is clear—getting an instrument rating is a big deal. Think of costs as a blend of aircraft use, instructor time, and other needs like charts and test fees.
A clear plan prevents budget nightmares. I categorize expenses into “must-haves” and “nice-to-haves,” then check it with my schedule. Factors like simulator use, fuel costs, instructor availability, and checkride timing impact the budget and timeline.
The timeline can be tricky. Flying regularly means you keep improving. Flying sporadically means relearning skills. Plan for a normal pace and a busy schedule to stay realistic.
This summary helps you understand costs and time without getting bogged down in details. It’s meant to help you decide, not to argue with fellow pilots.
| Cost or Time Driver | What It Usually Includes | How It Affects Your Budget | How It Affects Your Timeline |
|---|---|---|---|
| Aircraft and instructor time | Dual IFR lessons, approaches, holds, route planning, debriefs | Largest share for most pilots; grows fast with extra repetitions | Consistency shortens the path; gaps between lessons stretch it |
| Simulator training | Procedure reps, partial panel work, approach flows, scan discipline | Can reduce expensive airplane time if used with a clear plan | Speeds learning when scheduled in tight clusters |
| Ground school and study materials | Course access, books, question banks, note systems, practice tests | Predictable spend; worth it if it prevents wasted flight hours | Good prep keeps lessons efficient and reduces rework |
| Testing and checkride expenses | Written exam fee, examiner fee, aircraft rental for the ride, prep flights | Often a “lump sum” moment; easy to underestimate without planning | Scheduling backlogs can delay the finish even when you’re ready |
| Currency and proficiency gaps | Rust removal, extra approaches, repeated briefings, remedial maneuvers | Adds hidden costs through extra hours and extra instructor time | One missed month can echo for weeks in retraining |
For a plan that takes precedence, keep it straightforward. Have a regular weekly schedule you can follow, and view each lesson as a mini-project. This approach keeps your goal—to earn the rating—in line with your time and budget.
Common Hurdles and Pro Tips
Training for an instrument can make you value boring routines over exciting ones. The goal might seem shiny, but achieving it involves simple, repetitive tasks. To get clear skies in flight, you’ve got to put in work on the ground.
Think like a reviewer: instructors and DPEs judge what they see, not what you planned. They spot the basics first, much like how an editor views a headline. That’s why it’s crucial to nail the basics—it shows in everything you do.
Big issues are often not dramatic, but everyday mistakes. Like forgetting to make a call, giving unclear briefings, or mixing up procedures. These mistakes whisper to others that your skills aren’t polished. To show you’re truly ready, your actions need to back it up.
Here’s my go-to strategy whenever I feel overwhelmed:
- Brief like a minimalist: Share your goal, any risks, and what’s next. Then, zip it.
- Chair-fly out loud: Practice your radio talk, button pushes, and checks as if flying for real.
- Standardize your scan: Look at your instruments, check navigation, then the sky. Stick to the order.
- One change at a time: Adjust power, then pitch, then trim. Avoid the urge to do it all at once.
- Debrief with facts: State what happened, why, and your next steps clearly.
Remembering tough parts gets easier with a straightforward checklist. When things get busy, you need simple, effective tools. This approach might seem basic at first but it works.
| Hurdle | What it looks like in flight | High-yield fix | What the examiner infers |
|---|---|---|---|
| Unstable approaches | Chasing the glide slope, making late adjustments, trying to recover too late | Meet stabilized criteria early, make small tweaks, and know when to start over | Your risk management needs work |
| Radio overload | Missing transmissions, talking over others, forgetting your clearances | Write down, review, then highlight your plan before moving or changing settings | You’re struggling to manage tasks |
| Procedure memory lapses | Pausing at critical moments, skipping steps, setting up incorrectly | Rehearse each step until it’s automatic and predictable | Your preparation is uneven |
| Navigation setup mistakes | Choosing the wrong settings or frequencies | Always go through your “source, course, frequency, ident” checklist | You need to know your systems better |
| Not keeping level | Constantly adjusting altitude and trim | Power, then pitch, then trim. Confirm everything calmly | Your fundamental IFR skills need work |
Keep your preparations detailed, accurate, functional, and honest. Then, everything feels more straightforward. It isn’t about heroic efforts, but doing the right things well. This is the real secret: the exam usually rewards thorough, well-explained work.
Resources for Your IFR Journey
I like my IFR resources neat, up-to-date, and simple to check. Just like a good approach plate. Main Keyword and Related Keywords help a lot here. If it’s hard to find quickly, it’s not doing you any favors when you’re busy or studying.
Let’s think like someone who loves to get citations just right. APA 7 came out in October 2019. It likes things in a certain order. You’ll see the author’s last name and initials, year in brackets, titles in sentence case, and periodical titles in title case, with italics for the journal title and volume.
When I track training claims and safety stats, I use a format that might seem dull. But just like a thorough preflight check, it’s reliably good.
Author, A. A., Author, B. B., & Author, C. C. (Year). Title of article. Title of Periodical, volume(issue), pages. https://doi.org/xx.xxx/yyyy
DoIs are super important. Always use a DOI if there is one, even in print articles. If no DOI is available, use a web address. Choose stable web addresses over complicated ones.
Finding and keeping track of sources matters because you’re building a path you can follow later. Use search tools that highlight key words in titles and abstracts. Pick well-indexed sources you can easily find again. This isn’t just about being picky; it’s smart time use.

| Resource Type | What to Look For | How to Record It (APA 7 mindset) | Why It Helps IFR Study |
|---|---|---|---|
| Peer-reviewed journal article | Clear methods, searchable abstract, DOI listed | Capture full citation + DOI; keep periodical title and volume in italics | Gives verified claims you can revisit when you’re prepping for oral questions |
| Stable archive entry | Stable URLs that don’t change with each click | Save the stable URL and the access path used for databases and retrieval | Makes it painless to re-check a quote or chart when you’re stressed and short on time |
| Magazine or trade coverage | Date precision (month/day), publication reputation | Use the periodical date format; keep titles consistent with APA 7 rules | Good for trends and context, but you’ll want to cross-check key claims |
| Newspaper reporting | Specific event coverage, clear byline and date | Log author, full date, and a stable URL when available | Useful for policy changes that affect IFR training and testing schedules |
Real examples matter because being genuine is better than just feeling right. Like Scruton, R. (1996) shows.
If a DOI isn’t there, keep everything else sharp and easy to trace.
Baniya, S., & Weech, S. (2019) is a prime example. That DOI is key for finding it again, even if your bookmarks fail you.
Denny, H., Nordlof, J., & Salem, L. (2018) show us how a stable link from JSTOR is like a reliable waypoint. It’s not about being showy; it’s about being there when needed.
Periodicals differ, and so do their citation details. A magazine might be cited like one from Peterzell (1990, April, Time). A newspaper might look like Schultz (2005, December 28, The Country Today). And a review might follow its own format, like Baumeister (1993). Different forms, but the same goal: clean, easy-to-find databases with stable links where possible.
Keep Main Keyword and Related Keywords noted, and your future self will be grateful. It turns a confusing mess into a searchable system. And in IFR training, being able to find something again is key to safety.
Conclusion: What Doors an Instrument Rating Opens
I once thought the Main Keyword was just another item to tick off. Then I learned how an IFR clearance can quickly turn your day around. It’s not like the quick fixes in movies. Instead, it means better planning, sharper decision-making, and staying calm when the weather disagrees.
The main takeaways are as follows: you must first meet the required preconditions. Next, you need to develop good habits during ground school. After passing the written exam, it’s time for simulator sessions, hood work, and real-life approaches. This practice helps you master your skills. The Related Keywords suggest this: earning the rating is about discipline, not just feeling good.
The core idea is straightforward: An instrument rating shapes your professional image. It’s like a compelling headline for your career, showing you can handle work, stay on top of things, and follow rules when necessary. In the U.S., this reputation is important to flight schools, employers, and passengers who trust in your unseen expertise.
To sum it up briefly: Yes, IFR training requires time and money. But what you gain is skill and freedom of choice. Every study, practice, and review session builds valuable experience. Once you’ve got it, you can fly more, do more, and say “yes” more often, turning potential “maybes” into opportunities.