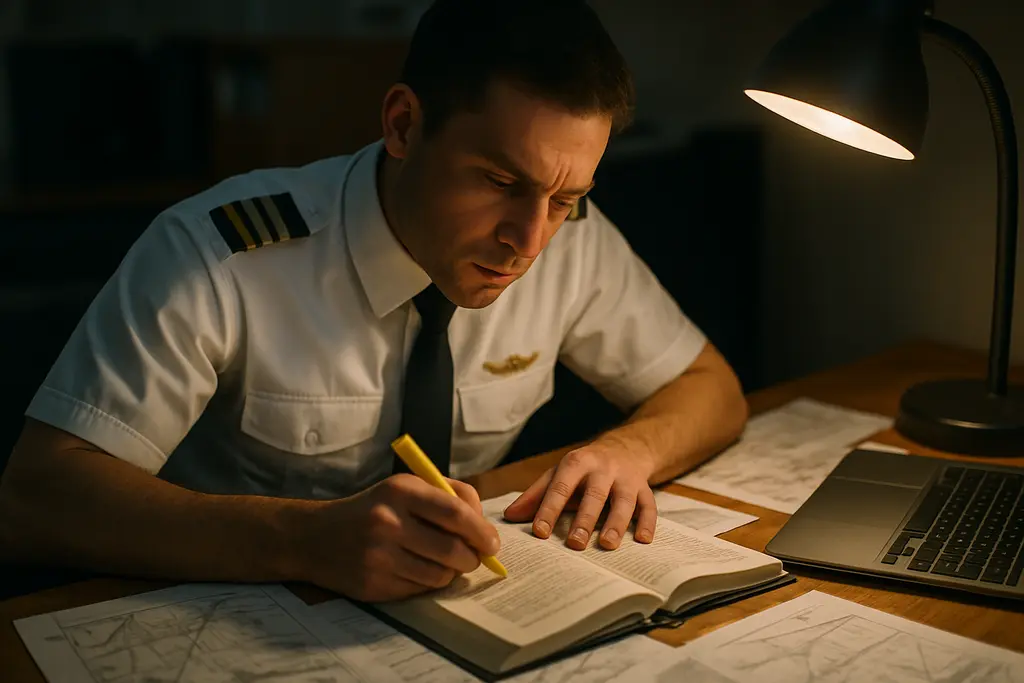
Getting your instrument rating is a smart move after earning a private pilot license. It’s key for most flying jobs, except some local or skydiving flights. When you least expect it, you’ll need the instrument skills, like unexpected turbulence.
But it’s not all about flying through clouds. The training adds more flying with instruments, making smart cross-country choices, and keeping ahead of the plane. These skills don’t just keep you safe; they can also lower insurance costs for plane owners.
Instrument training covers lifesaving basics, such as understanding important flight instruments and handling lost communications. It prepares you for unexpected problems, with a focus on safety and precision.
To fly under Instrument Flight Rules (IFR), you must meet specific rules found in 14 CFR § 61.65. The FAA uses this to check your flight experience in detail. The examiner will thoroughly review your logbook and training records to make sure you meet all requirements.
The checkride tests your ability to plan, brief, fly, and adapt to changes. Going for it means advancing your career, flying more efficiently, or having it as a backup. Like bringing an umbrella for a forecasted clear day—it’s better to have it and not need it.
What to Expect During the Checkride
The instrument checkride is like a play in two parts, and yup, you’re in the spotlight from start to finish. First, there’s the ground/oral part: this covers weather, planning, systems, and those deep “why” questions. These questions show you have more on your mind than you thought. Then, in the flight part, you both fly and explain your actions. It’s like being a sports announcer who’s really into checklists.
The prerequisites for the instrument rating must be all clear first. You need instructor OKs, to pass your knowledge test, and the right training per §61.65. According to FAA rules, missing any paperwork is like showing up for the final without attending class—not a smart move.
Examiners check specific “flight test items,” not just how you seem. Each item has to do with planning, procedures, and how well you fly. Even simple flying moments are your chance to show how you handle risks, keep ahead, and explain actions clearly.
The checkride generally goes as you’d expect, which feels good until you see the catch. You brief, check, and do tasks, then start again with something new. The examiner decides what you’ll face, under safe conditions and with the plane ready and documents checked.
- Weather checks, backup plans, fuel needs, and making a smart go/no-go decision
- Planning flights, checking the cockpit, and knowing IFR rules by FAA
- Handling ATC clearances, departures, mid-flight work, and landings
- Giving clear briefings on holding patterns, intercepts, tracking, and approaches
- Doing various approaches, managing a missed approach, and ensuring a smooth landing
- Dealing with emergencies like engine troubles or system failures
If your plane has it and it works, using automation like autopilot or FMS is okay. They help you juggle tasks, but be ready for questions about their use and what to do if they fail. And if this is your first time qualifying, expect to fly at least one approach manually. That’s because the test is about showing you can actually fly, not just press buttons.
| Checkride phase | What you’ll likely do | What the examiner is really measuring |
|---|---|---|
| Oral (ground) | Talk about the weather, your flight path, alternative plans, the plane’s systems, and how you handle risks | How well you know IFR, understand the systems, and follow FAA rules |
| Preflight & clearance | Make sure all documents are good, set up the plane’s tech, go over the clearance, and taxi carefully | Your ability to organize, discipline in the cockpit, and spotting issues early |
| Departure & enroute | Take off, navigate, keep in touch with ATC, handle tasks, and stay one step ahead | How well you follow procedures, stay aware of your surroundings, and handle tasks smoothly |
| Holding | Enter the hold, time it, adjust for wind, and plan your exit | Your precision and ability to explain your actions as they happen |
| Approaches & missed | Tackle both a precise and a less precise approach, handle a missed approach, and get set again | How stable you are, how well you meet standards, and if you stay focused under stress |
| Automation & failures | Use autopilot or FMS right, then manage any partial-panel or system troubles | Your knowledge of modes, how you plan backups, and your skills when gadgets fail |
To make your checkride day go smoothly, treat each test item as its own little story. Set up the situation, brief it, do it, and describe what you’re seeing and doing. Clear thinking like this pays off in the checkride. It’s especially true when FAA rules and real weather conditions test you. After all, flying IFR is about being reliably dull, not about dramatic gestures.
The IFR Oral Exam: What You’ll Be Asked
The IFR oral isn’t just about knowing acronyms. It tests if you can think within the system while staying calm. You’ll be asked about IFR eligibility and FAA rules, and how they apply to real-life decisions, not just random facts.
The examiner wants to see if you can interpret IFR charts as if they’re telling a story. Be prepared to discuss MEA, MRA, MCA, and the minimum obstruction clearance altitude. Also, explain their significance. If you get them confused, you’ll have problems with both the chart and terrain.
Expect scenario-based questions that seem easy at first glance but are complex in reality. You need to be able to brief an approach, highlight important altitudes, and describe when to start descending upon arrival. These exercises test your speed, configuration, and timing management skills.
The exam also includes the human factor, testing how you deal with disorientation, landing illusions, and decision-making under pressure. It checks if you’re aware of the risks and can still make disciplined choices.
Communicating with ATC is key. You must be able to echo an IFR clearance accurately: route, altitude, departure frequency, and transponder code. The aim is to be both quick and precise, avoiding drama.
Lost communication procedures are crucial as well. The examiner wants to make sure you know the FAA rules for such situations and how they apply to your specific route and clearance. It’s about maintaining a predictable flight, not just memorizing steps.
| Oral Topic | What You’re Expected to Do | Common Trap |
|---|---|---|
| IFR chart altitudes | Differentiate MEA, MRA, MCA, and minimum obstruction clearance altitude and explain operational impact | Using the right term but the wrong reason, especially on segment changes |
| Approach briefing | State the plan: navigation source, final approach fix, mins, missed approach, and threats | Skipping the missed approach like it’s a deleted scene |
| Arrivals and crossing restrictions | Explain when to descend, how to meet restrictions, and how to stay ahead of the airplane | Assuming “descend when you feel like it” is a procedure |
| ATC clearance readback | Read back route, altitude, frequency, and squawk accurately and promptly | Fixating on one detail and dropping the rest |
| Lost communications | Apply standard procedures to your specific clearance, route, and phase of flight | Reciting rules without showing how you’d fly them |
At the core of these exams is the requirement to meet instrument rating standards, complete necessary ground training, get endorsed, and pass the knowledge test. This written exam is crucial. It sets the stage for what you’ll need to discuss in detail later.
My top advice is simple: complete the FAA knowledge test early using a quality test-prep program. The question bank is vast, so “winging it” won’t cut it. Once the knowledge test is behind you, the oral exam becomes an exercise in clear thinking under pressure, with fewer unexpected questions.
Flying Approaches Under Pressure
Pressure doesn’t announce its arrival. It creeps in when indicators flicker, time ticks loudly, and you replay past mistakes. Regardless, your flight and instrument rating demands are clear. They want proof you can handle IFR approaches under stress.
When stressed, following a set procedure is your best ally. You will plan, set up, and carry out both non-precision and precision IFR approaches. Then, treat any missed approach as a small, separate flight. View it as a three-step process: get set, descend, and if it doesn’t look right, divert. The tester isn’t being overly serious for no reason; it’s all part of the test.

Training here is straightforward to avoid confusion at critical moments. You’ll practice holding patterns that test your focus. You’ll navigate DME arcs, which are like solving puzzles in the sky. Every approach must be briefed carefully, not rushed through.
Learning various approaches isn’t just for fun. It teaches you to use different navigation systems: ILS, RNAV (GPS), and VOR. This variety is crucial in modern aviation training. If you can’t set it up correctly, you’re not fully prepared. These instrument training rules are strict for good reason.
Autopilot or FMS may help during an approach, and you’ll show you can use them. But hand-flying at least one approach is required for your initial qualification. The plane relies on you to make careful, precise controls every time, especially under pressure.
Being able to read charts accurately is essential. Mistakes in reading MEA, MRA, and MCA can lead to major issues. Understanding every detail, not just the minimums, is vital. Your brain might try to guess under stress, but you shouldn’t let it.
| Checkride skill | What the examiner is really watching | Pressure trap | Simple fix that holds up in IMC |
|---|---|---|---|
| Holding patterns | Entry choice, timing, wind correction, and a steady scan | Chasing the CDI and drifting while “doing math” | Brief the entry out loud, then fly headings first and refine |
| DME arcs | Radius control, intercept planning, and smooth step-down awareness | Late turns that balloon the arc and wreck spacing | Lead turns early, keep a small bank, and use trend monitoring on DME |
| Precision approach (ILS/LPV) | Localizer and glidepath discipline, stable configuration, and proper callouts | Fixating on one needle and forgetting power | Cross-check attitude, power, and trend; stabilize by 1,000 feet AGL |
| Non-precision approach (VOR/localizer) | Step-down compliance, timing or distance awareness, and controlled descent | Diving for the runway and busting altitude | Use a planned descent rate and verify each altitude constraint |
| RNAV (GNSS) setup and execution | Correct loading, mode awareness, and verifying the right fixes and minima | Wrong approach or wrong transition loaded “because it looked right” | Pause to verify approach name, transition, and final course before arming |
| Missed approach management | Immediate control, correct navigation, and clean communication flow | Power up but forgetting the first turn or altitude | Fly the first instruction from memory, then confirm on the chart |
This may seem tough, but it’s necessary. Just meeting the flight hours requirement isn’t enough. You must show you can stay calm when flying gets challenging. Master the procedures, and the pressure will feel less overwhelming.
Examiner Red Flags and Tips
DPE’s mood can quickly change if paperwork is wrong. Especially if they find a missing logbook endorsement. According to FAA rules, being “close” isn’t good enough. It means you have to try again later.
If your flight experience doesn’t clearly match §61.65, expect doubts. An examiner will get cautious if your instrument rating info is spread out over different places. Neat records are better than any story.
The difficult bit is the long IFR cross-country. It needs to be exactly 250 nm. No rounding up from 249.6 or similar. Falling short even by a little means redoing an expensive flight and rescheduling the checkride. Avoid giving the DPE a math error you made.
Distance isn’t the only factor. The 250 nm journey must have specific flight plans, an instrument approach at each airport, and three different navigation system approaches. These tips might seem dull but they’re lifesavers for your schedule and budget.
Don’t expect to redo tasks without a solid reason. The only exceptions are for safety, avoiding a crash, misunderstood requests, or if the examiner gets distracted. Asking for a second chance rarely works.
Being realistic is key. Examiners like it when you use actual IFR plans and radio navigation. It shows you’re ready for the real world. Understanding FAA rules becomes easier and feels more like common language.
| Red flag the examiner notices | Why it raises skepticism | What to bring or verify before the ride |
|---|---|---|
| Unclear or missing logbook endorsement | It blocks eligibility and forces a deeper audit under FAA rules | Match endorsements to the instrument rating prerequisites; ensure dates, signatures, and instructor certificate info are legible |
| §61.65 time totals that don’t “add up” at a glance | Ambiguity looks like a gap in aeronautical experience, even if you actually qualify | Organize totals on a clean summary page; tab key flights and entries for fast review |
| Long IFR cross-country shows less than 250 nm (even 248) | Distance is a bright line, not a vibe; a shortfall can require reflying the entire requirement | Verify mileage with the planned routing; keep supporting planning notes and the logged route consistent |
| 250 nm flight missing required approach variety | The rule expects breadth: approaches at each airport and three different kinds using navigation systems | Confirm each approach type is logged and identifiable; note nav system used to remove doubt |
| Asking to repeat tasks without a valid reason | Examiners typically don’t repeat items unless safety or misunderstanding justifies it | Use calm clarifying questions early; treat each task like it’s the only take you’ll get |
| Training feels “sim-only,” not system-ready | Many DPEs expect realism: filed IFR, real radios, and usable facilities | Plan the checkride environment like a real trip; show strong briefings and disciplined comms as instrument checkride tips in action |
Avoiding Common Mistakes
The quickest path to failing a checkride isn’t poor flying—it’s messing up paperwork. Many skilled pilots get confused between Part 61 and Part 141. They treat them like identical playlists on different music apps.
For Part 61, the instrument rating rules are clear: 50 hours of cross-country as PIC (pilot in command), including at least 10 in an airplane for those pursuing an instrument-airplane rating. You need 40 hours of actual or simulated instrument time. Also, 15 hours must be spent with an instructor who has an instrument-airplane rating. If your logbook entries are unclear, even if the totals are correct, you might still feel uncertain about your IFR (Instrument Flight Rules) qualification.
Part 141 might seem easier because it requires only 35 hours of instrument training. There’s no cross-country flight requirement. But, graduating depends on passing stage checks, syllabus completions, and the flight school’s program. This means less flight time doesn’t equal fewer rules. If you’re not careful with your flight logs, you might still face issues.
Another common mistake is waiting too long to complete the final 3 hours of instrument training. This needs to happen within two months before the practical test. Procrastinating can make you miss this deadline. If that happens, you won’t meet the requirements for your instrument rating—even if everything else is in order.
Using simulators can be helpful, but you must log the time correctly. For time spent flying with instruments in an airplane, you need a device that limits your view under VFR conditions. A safety pilot must accompany you. If you’re in an FAA-approved simulator, an authorized instructor must observe. They must also sign your logbook, according to §61.51(g). Saying “I practiced at home” won’t count for your IFR qualification.
| Area pilots misread | What the rule actually says | How it affects IFR eligibility |
|---|---|---|
| Part 61 cross-country PIC | 50 hours cross-country PIC, including 10 hours in an airplane for instrument-airplane | Shorting cross-country time can stall your instrument rating requirements at the finish line |
| Part 61 instrument time | 40 hours actual or simulated instrument, with 15 hours from an authorized instructor holding an instrument-airplane rating | Instructor time matters; “solo hood time” won’t cover the full requirement |
| Part 141 minimums | 35 hours minimum instrument hours, no cross-country requirement, but stage checks and sign-offs control progress | Flight hour requirements may be lower, but completion depends on documented training gates |
| Device credit limits (Part 61) | FFS/FTD max 30 hours if per Part 142, max 20 hours if not; AATD max 20; BATD max 10 | Over-crediting simulated instrument time can invalidate totals during the checkride review |
| Part 141 device caps | FFS ≤ 50%; FTD or FTD+ATD ≤ 40%; AATD or AATD+FTD ≤ 40%; BATD ≤ 25%; combined devices ≤ 50% | Even “approved” hours can be too many if you exceed the percentage caps |
Another hidden mistake happens when pilots fly VFR (Visual Flight Rules) by habit after getting their rating. This leads to two big issues. Pilots avoid controlled airspace, breaking rules, and they lose their instrument flying skills. This situation is common and can be problematic, as explained in flying VFR with an instrument rating.
Being current doesn’t mean you’re proficient. The standard for checkrides doesn’t change based on how good you felt last year. If you haven’t flown in real IMC conditions recently, it’s time to practice. Fly with a safety pilot, do an IPC with a certified instructor, and use your simulator time wisely. Try practicing missed approaches, holding patterns, and dealing with unexpected failures.
A good routine is key. File for IFR on most of your flights. Get your clearance before taking off. Fly a proper approach, including the procedure turn, then cancel IFR after you land. This practice isn’t flashy, but it keeps your instrument skills sharp. It turns your rating into a real skill, not just a test to pass once.
The Day Before: Prep Checklist
The night before a checkride, my brain goes into high gear. I go through the list of what I need for the instrument rating. I start with the basics: Private pilot certificate? Got it. Can speak English? Yes. Medical certificate up to date? Yes. I also remember the age requirement that is easy to forget.

Then, I focus on the paperwork. It’s crucial to have everything written, dated, and signed. This includes the endorsement that says I’m ready. Saying “my instructor thinks I’m ready” is not enough for the FAA.
After that, I review essential topics one last time. It’s like doing a final check of important agreements. I make sure I’ve covered all the necessary knowledge areas. I also look at recency and proficiency guidance. This isn’t because I’m taking my test in Canada, but because being thorough is always good.
Next, I go through my flight hours very carefully. I double-check hours for cross-country, instrument time, and lessons with an instructor. I also make sure I meet specifics like the long-distance IFR flight with required approaches. And I don’t overlook the “3 hours within the last 2 months” rule.
Looking at charts is my next step. Being organized shows I’m ready. I make sure I have all the charts for my area and that my electronic flight bag (EFB) apps are up to date. An EFB is helpful, but it should not get in the way or replace real navigation tools.
Finally, I practice scenarios that examiners focus on. These include handling lost communication and dealing with common issues in the cockpit. My aim is to manage risks, stick to FAA rules, and not make things up on the fly.
| Prep item | What I verify | Why it matters on checkride day |
|---|---|---|
| Instrument rating prerequisites | Private pilot certificate, English proficiency, valid medical, age baseline tied to private minimums | Stops a “no-go” before it starts and keeps the oral focused on flying, not eligibility |
| Knowledge test endorsement | Correct wording, signature, date, and that the practical-test readiness endorsement is also logged | Prevents a paperwork delay that feels petty until it happens to you |
| Logbook time audit | 50 XC PIC; 40 instrument; 15 with instructor; 250 nm IFR XC with required approaches; 3 hours in last 2 calendar months | Keeps the examiner from finding “creative accounting” in your totals |
| IFR charts and data | Current IFR charts for test area, including approach plates; up-to-date nav database on avionics/EFB | Reduces heads-down scrambling and makes briefings cleaner and faster |
| EFB setup | ForeFlight/Garmin Pilot configured; device charged; backup plan; mount secure and non-interfering | Improves situational awareness without creating a cockpit hazard |
| High-frequency failures | Lost comm flow, partial-panel scan, and likely system malfunctions with checklist use | Shows disciplined decision-making instead of guesswork under pressure |
What Happens If You Don’t Pass?
Not passing feels huge, like a major TV show ending. But actually, it’s about getting more paperwork, making a plan, and trying again calmly.
An instrument checkride retest pretty much starts with finding the problem. Instead of just flying more, it’s smarter to work on your weak spots.
The FAA rules decide what your retest looks like. If you did well on other parts, you might only redo the missed parts.
This partial retest usually happens within 30 days of failing. You’ll need your previous report and a letter saying you’ve trained more. Think of it as a small update rather than starting over.
If you missed a lot on your first try, the solution changes. If more than three items got low marks, you’re looking at a full retest. That’s because it wasn’t just one small mistake.
| Retest route | What you bring | What gets evaluated | What triggers it |
|---|---|---|---|
| partial retest | Prior test report and a training/recommendation letter | Only the previously failed tasks, flown to standard | Limited unsatisfactory items and a clear, isolated deficiency |
| Complete retest | Meeting the admission items again, plus fresh endorsements as needed | Areas of operation across the practical test, like day one | Too many unsatisfactory tasks or broad skill gaps that can’t be contained |
A common mistake is the long IFR cross-country. If it’s less than 250 nm, you might need to repeat the flight. It’s a set back that feels rather unromantic.
When retraining, focus on what’s needed for the instrument rating and the specific areas you were weak in. Just adding flight hours without a focus doesn’t impress §61.65.
Yes, failing hurts. But there’s a way forward. Stick to FAA rules, train specifically, and face your retest prepared and confident.
Success Stories
Success stories in instrument flying are not like the movies. Instead, they’re about patterns. AOPA identifies three key reasons people learn: for their career, for safety, and to improve travel for work or fun. Each reason influences their training choices, aircraft access, and how they judge their progress.
For career-focused pilots, getting IFR certified is about meeting deadlines and keeping track of their progress. They’re all about hitting their goals and making sure they’re on track for the instrument rating. Pilots learning for safety want to stay calm when weather gets bad and plans change. And those learning to make trips easier want fewer flight cancellations and less drama from bad weather.
How you learn is also important. Part 141 schools offer structured programs with checks and detailed plans, making fewer “random” flights. Training with a local CFII can be more flexible, fitting around your schedule. And accelerated courses? They’re intensive and quick, requiring you to be well-prepared from the start.
Accelerated programs might come to your airport or ask you to travel. They usually last 10 to 12 days. This intensive training means you’ll fly, brief, and debrief repeatedly, like a pilot’s version of Groundhog Day. It’s best for those with tight schedules and good study habits.
The less exciting parts often lead to big successes. Complete ground lessons and the FAA knowledge test early. Then, make your flight lessons about improving skills, not just discovering them. You’ll be surprised by the confidence you gain when you’re not struggling with new concepts.
Pilots who do well also build confidence in other ways. They can read IFR charts easily and give clear readbacks. They brief every approach the same way and know emergency procedures by heart. Their preparation makes flying smoother and less stressful.
Simulators and training devices often help pilots feel more in control of their flights. If used correctly, they can improve your flying skills without wasting fuel or time. The goal is to practice specific skills, like hold entries and abnormal scenarios, then show you can do it in a real plane.
| Motivation | Training Path That Often Fits | Early Milestones That Predict Success | Confidence Builders That Show Up on Checkride Day |
|---|---|---|---|
| Career step | Part 141 program with structured instrument training and regular stage checks | FAA knowledge test completed early; steady logbook progress aligned to instrument rating requirements | Fast, accurate clearance readbacks; consistent approach briefings; reliable instrument scan under time pressure |
| “Just in case” safety | Local CFII training with scenario-based flights in familiar airspace | Ground training finished before heavy flight scheduling; clear plan to maintain IFR eligibility and currency | Disciplined lost comm procedures; strong chart interpretation of MEA/MRA/MCA; stable decision-making in changing weather |
| Personal/business productivity | Accelerated instrument course when schedule is tight and study time is protected | Knowledge test passed before day one; organized materials and flows to keep flight lessons efficient | Clean avionics workflow; standardized callouts; smooth transitions from en route to approach with minimal cockpit confusion |
After Your Checkride: Next Steps
Getting an instrument rating is just the beginning. Now, you need to stay sharp and proficient with every flight. The training got you here, but consistent practice will keep you safe.
For structure, I follow topics from AOPA’s guides on instrument flying. Topics include weather decisions, handling emergencies without all instruments, and the types of approaches. It’s important to keep revisiting these areas, especially planning for flights and staying current.
Even with technology aiding us, it’s crucial not to rely on it too much. I practice both using the autopilot and flying manually. Finding the right balance is key for showing true skill in instrument flying.
FAA regulations might seem dull, but they’re vital. Logging flight time correctly is crucial, including simulator hours with the right sign-offs. Keeping up with database and chart updates is a must. After all, neither the FAA nor the weather cares about excuses, only about proper documentation and skills.