Let me start with a common scene for ambitious pilots. They often face intimidating weather that seems straight out of a movie. The instrument rating is their key to fly safely in poor visibility, using instruments instead of the horizon. And yes, getting this rating costs real money.
One estimate says getting your instrument rating may cost between $7,695 and $8,095. This is if you stick to the minimum required hours. But, another source notes students often need 45 hours, not just 40. This makes the cost jump to about $10,580 for single-engine planes and $13,560 for multi-engine aircraft. So, the “minimum” is often less than what you end up needing, kind of like the misleading serving sizes on cereal boxes.
Don’t forget the hidden costs of IFR training: aircraft rental, instructor fees, preparing for the checkride, and other expenses. Details like taxes aren’t always included, prices can change, and how well you do can affect the hours you need. If your instrument rating lapses, the Instrument Proficiency Check isn’t just a test of skills. It’s also a reminder to be honest with yourself about the costs and to keep up with legal and safety standards.
What is an IPC and Who Needs It?
Pilots often mix up two ideas: the Instrument Rating and the Instrument Proficiency Check (IPC). The rating is a big step. It includes training, a knowledge test, and a checkride for flying under Instrument Flight Rules (IFR). The IPC is what you use when you’re out of practice or not current. IFR skills need regular use to stay sharp.
The cost of instrument training should include the IPC. Getting the rating opens the door; staying proficient keeps you in the game. Your skills in IFR can decline without notice. Then, they suddenly matter when bad weather limits your visibility and choices.
IFR training prepares you for flying when visibility is poor. This means you learn to fly and navigate without seeing the ground or landmarks. Many pilots aim for the rating because it offers more flexibility, options for destinations, and fewer cancellations due to weather. But keeping those skills sharp is crucial.
Who needs an IPC? It’s for any pilot with an instrument rating who isn’t current. It’s also for those who are current on paper but feel unsure in practice. Even smart, careful pilots can get rusty. Life gets in the way, flights are cancelled, and sometimes confidence doesn’t match reality.
The cost of IFR isn’t just a one-time thing. It includes ongoing costs like paying for an instructor, renting aircraft, using simulators, and occasional reality checks. Think of these costs as regular upkeep for your flying skills, not unexpected charges.
| Item | Instrument Rating | Instrument Proficiency Check (IPC) | How it affects planning |
|---|---|---|---|
| Primary purpose | Earn IFR privileges | Restore proficiency and currency | One is a milestone; the other is upkeep with recurring expenses |
| Typical trigger | Moving beyond VFR limitations | Not current, rusty skills, long gap between IMC/approach work | IPC becomes part of the ongoing IFR cost even after the rating |
| What you’ll do | Structured training, test prep, checkride standards | Targeted review: approaches, holds, procedures, decision-making | Helps keep instrument training price expectations realistic over time |
| Outcome | New certificate privilege | Logbook endorsement to regain IFR flying capability | Reduces the chance of paying extra expenses later due to skill backsliding |
Legal Requirements for Instrument Currency
In aviation, “legal” means the part pilots promise to read later. But later might come suddenly, like during a night flight in bad weather, when you’re given a clearance you can’t just wing. Instrument currency is crucial, starting with the basics of formal training and tests. This foundation is key to understanding your costs in IFR.
Most training courses require a minimum of 40 hours of instrument training. Good news: up to 20 hours can be in a certified simulator. This is great for saving time and money. It’s a smart way to get your instrument rating without compromising on important training.
Then, you’ll need to build your flight hours, which makes your logbook and schedule packed. You’ll need 50 hours of pilot-in-command cross-country flight time. Plus, there’s a long cross-country flight in there, too. It seems even the sky likes to keep track of paperwork.
The tests are crucial, with a written exam requiring at least a 70% pass in some places, like Transport Canada’s INRAT. Then, there’s a flight test with an examiner. These steps are key for planning your budget, taking into account things like checkrides, instructor time, and plane use.
| Requirement Lever | Typical Baseline in Many Programs | Why It Hits IFR Cost | Practical Ways to Save on Instrument Rating |
|---|---|---|---|
| Instrument training hours | 40 hours total | Aircraft and instructor time stack up fast, especially in busy airspace and longer lessons | Plan tighter lessons, brief at home, and fly with a clear objective to avoid paid “wandering” |
| Simulator allowance | Up to 20 hours in a certified simulator | Sim time can reduce aircraft hours and keep training moving when weather or maintenance blocks flights | Use the sim for holds, failures, and procedure reps; save aircraft time for real-world workload |
| PIC cross-country time | 50 hours PIC cross-country | Longer trips often mean more fuel burn, more rental hours, and more scheduling friction | Combine trips with real travel needs and pick efficient routes that still meet logging rules |
| Dual IFR cross-country | At least 100 NM under simulated or actual IFR | Dual time adds instructor fees, and IFR routing can extend block time | Build a route that includes approach variety in one flight to reduce repeat sorties |
| Knowledge test and flight test | Written exam (70% minimum in some systems) and an examiner flight test | Retests, extra prep flights, and examiner scheduling can add surprise expenses | Front-load ground study, run mock orals, and keep checkride maneuvers “check-ready” all month |
Some training paths even detail logistics, like having written exams in a Transport Canada office in Calgary, and flight tests at Excel Flight Training Incorporated. Even if you never go to Alberta, the point is clear: training requirements are set. This predictability helps you manage costs and avoid turning your training into an unexpected hobby.
What’s Covered in an IPC?
An IPC, or when you notice your scan has gotten lazy, is pretty much all about your instrument training minus the initial warm-up. It begins with ground training. Why? Because IFR isn’t just flying; it’s about understanding the paperwork and procedures. Right from the start, be ready to dive into regulations, IFR flight plans, and how to approach instruments.
Then, we focus on understanding weather. You’ll learn to read METARs, TAFs, and forecasts as if your flight depends on them. Because, honestly, it does. After that, it’s all about navigation and communication. You’ll need to stay oriented using only your instruments, make smart choices with your avionics, and talk to air traffic control smoothly.
Once you’re in the plane or simulator, the core task is simple: fly using the instruments and keep a step ahead. You will practice instrument approaches, follow courses, and adjust without losing control. And be ready for surprises, such as equipment failures or unexpected changes in your approach plan.
Approach work covers both precision and non-precision types. Precision approaches usually involve an ILS. For non-precision, you might use VOR or NDB procedures, depending on your aircraft and what’s available.
Don’t forget holding patterns. This is where air traffic control tells you to wait in the sky, and you really have to. You need to enter, maintain, and leave these holds while managing your altitude, speed, and timing well. It’s crucial, even though it might not seem exciting.
| IPC focus area | What you’re expected to do | What commonly trips pilots up | How it can affect expenses |
|---|---|---|---|
| Regulations & IFR procedures | Explain currency rules, alternates, and approach requirements in plain language | Mixing up “legal” vs. “smart,” especially with weather and alternates | Extra briefings can add time, nudging instrument training price upward |
| Weather interpretation | Use METARs/TAFs to brief a route, ceilings, visibility, and risks | Ignoring trend clues and fixating on one number | More time on scenario planning can raise expenses |
| Instrument approaches | Brief, set up, fly, and go missed while staying stable and precise | Late configuration changes and chasing the glideslope | Repeat approaches can increase instrument rating cost over multiple sessions |
| Holds & course tracking | Enter correctly, keep the hold tight, and manage timing and wind correction | Overcorrecting for wind and losing situational awareness | Cleanup training may add billed time, affecting instrument training price |
| Failures & workload management | Prioritize, troubleshoot, and keep control with partial panel or degraded systems | Fixating on the problem instead of flying the airplane | More simulator time can reduce aircraft expenses, but it still affects total instrument rating cost |
This isn’t meant to catch you off guard. Think of it as a reflection. If your basic skills are strong, the IPC is just a structured review. But if they’re not, it’s a quick way to see what’s making your instrument rating costly. It boils down to the time spent, needing to repeat, and how you manage the workload.
Preparing for Your Review
I treat IPC prep like doing taxes early: dull, responsible, and oddly rewarding. It saves me money. The quickest ways to save on instrument rating time are not exciting. They are the simple habits that prevent my logbook from being a mess.
The plan is usually clear: ground school plus flight training. Ground work involves mastering the details. This includes regulations, IFR flight plans, and interpreting weather. Also, it covers instrument navigation, ATC procedures, and reading approach charts. Ignore this, and the cost of your IFR creeps up like an unused subscription.
Some ground schools meet two nights in a row each week. It’s efficient, but also demanding. It tests how much you enjoy figuring out weather reports as if they’re big plot twists. Still, regular study stops the cost from increasing.
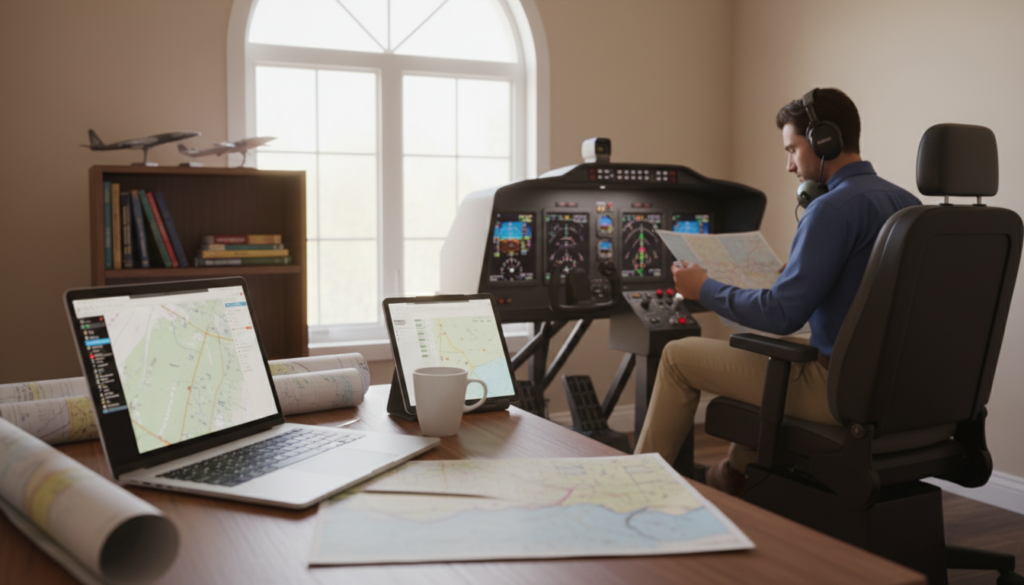
For flying, expect at least 40 hours of dual instruction under the instruments. Many learners need about 45 hours to finish. Not preparing can add costly extra hours to your training.
| Prep area | What I focus on | Why it controls IFR cost | How it affects instrument training price |
|---|---|---|---|
| Regulations & currency rules | Required tasks, endorsements, and recency items | Fewer unexpected gaps that need extra sessions | Less time spent re-learning fundamentals with an instructor |
| IFR flight planning | Routes, alternates, fuel planning, and backup plans | Better briefings reduce confusion in the air | Shorter lessons because plans are solid |
| Weather & risk decisions | Weather trends, signs of ice, and decision times | Fewer delays from poor decisions | Less need to reschedule and repeat lessons |
| Charts & procedures | Understanding approach plates, minimums, and missed approach steps | Less wasted time during flights | More efficient, saving money on training |
My prep checklist is straightforward, because simple works best under pressure. I practice by reading approach plates and practicing radio communication. It might not be fancy, but it ties the cost of training to actual skill.
- Before ground: I look over regulations, the basics of flight planning, and chart symbols.
- Before flight: I make sure I can recall an approach, a holding pattern, and the plan for a missed approach.
- Before the review: I do a complete mock briefing to make the actual IPC feel familiar.
Here’s the deal: invest time now or pay more later. If you’re dedicated to managing costs, preparation is key. Discipline here always outperforms relying on luck.
Practical Tips & Simulated Approaches
I love drama in films but not in actual instrument meteorological conditions (IMC). I see simulated training as essential, like a montage in a movie. It’s concise, repeatable, and keeps you grounded. Seeing the cost of instrument training go up? There’s an obvious solution. You can do up to 20 hours in a simulator out of the 40-hour minimum required.
Simulators are more than just for practice; they help manage your budget. These sessions are efficient. You waste less time moving on the ground or waiting. This means your instrument training doesn’t cost as much as it could.
When aiming for noticeable improvement, I focus on essential tasks. Practicing precision ILS approaches improves your discipline. Non-precision VOR and NDB approaches enhance your timing and planning. And holding patterns? They fine-tune your skills quietly but effectively.
- ILS helps with stable tracking and making precise corrections
- VOR/NDB builds confidence and helps plan your descent
- Holding patterns improve timing, wind correction, and how you handle tasks
- Emergency scenarios for making calm, straightforward decisions
Cross-country flying isn’t just for showing off. The 50 hours of PIC cross-country needed is where you test your IFR decisions. Choosing routes, planning for fuel, and navigating. Smart planning here can reduce unnecessary travel. This keeps your training costs from going up.
When weather is bad, trainers can mimic instrument conditions in a plane or simulator. This way, you can practice important skills without relying on the weather. It’s a great way to build skills without extra costs.
| Training Focus | What You Practice | Why It Pays Off | Cost Angle |
|---|---|---|---|
| Certified simulator time (up to 20 hours) | Approach reps, holds, abnormal procedures, fast resets | High repetition with less downtime and cleaner debriefs | Often lowers IFR cost by reducing aircraft time for drills |
| ILS precision approaches | Localizer tracking, glideslope control, stable configuration | Improves consistency under pressure and tight tolerances | Fewer repeat lessons helps steady the instrument training price |
| VOR/NDB non-precision approaches | Timing, step-down fixes, constant descent planning | Builds raw-data skill when GPS isn’t the hero | Clear briefings reduce re-flys, one of the best ways to save on instrument rating |
| PIC cross-country planning (toward 50 hours) | Alternates, fuel strategy, route selection, enroute decisions | Turns “knowledge” into real-world cockpit judgment | Efficient routing avoids extra hours that inflate IFR cost |
My strategy is straightforward: act as if each approach is your only chance. Remind yourself of the steps, prepare early, and focus on the task. Interestingly, when things get “boring”, your training costs become manageable. Your instrument training becomes cost-effective, turning theories on savings into everyday practices.
How Instructors Evaluate Performance
Instructors act as the bridge from watching training videos to actual flying in IMC. They observe your thought process, not just your skills with the equipment. Reaching the standard quickly keeps the cost of an instrument rating on budget.
Evaluation starts on the ground by checking your IFR planning skills. Can you take an ATC clearance easily, go through an approach chart smoothly, and talk about today’s important regulations? Being well-prepared reduces the need for repeating lessons.
In the cockpit, they watch how you handle basic tasks under stress. This includes maintaining steady airspeed, altitude, and direction, along with effective scanning and IFR navigation. If pressure throws you off, they’ll notice. Weather and costs don’t adjust to suit you.
Instructors also test your decision-making with unexpected challenges. Be ready for holding patterns, missed approaches, and handling equipment issues. Your role is to stay ahead of the plane and communicate clearly, not panic.
Feedback is detailed and ongoing. Instructors look for good habits: thorough briefings, accurate checklists, clever use of technology, and quick fixes. Achieving these standards quickly means less money spent on extra flying hours. Thus, you avoid a rise in the cost of your instrument rating.
| Evaluation Area | What the Instructor Watches | Common Slip-Up | What Helps Keep IFR cost Down |
|---|---|---|---|
| Clearances & communication | Accurate readbacks, correct routing, timely frequency changes | Missing an altitude or a fix in the clearance | Chair-flying clearances and using a consistent copy format |
| IFR navigation | Intercepts, tracking, course corrections, situational awareness | Chasing the needle and overcorrecting | Small corrections and verbalizing the next step before it happens |
| Approach execution | Briefing quality, stabilized descent, timing, callouts, missed approach | Late configuration changes and rushed briefings | Standardized approach brief and early setup to reduce rework expenses |
| Holding patterns | Entry choice, wind correction, altitude control, timing | Forgetting wind correction and drifting off the outbound | Practicing holds in a sim so flight time targets the weak spots |
| Systems & failures | Checklist discipline, partial-panel scan, workload management | Fixating on one instrument or skipping the checklist | Memorizing immediate actions, then backing them with the checklist |
| Aeronautical decision-making | Weather interpretation, alternates, fuel planning, risk choices | Pressing on with shaky ceilings “because it might work out” | Clear personal minimums that prevent expensive last-minute changes |
Instructors are looking for your ability to be consistent. Flying one good approach is not enough. They want to see you can do it well many times. This makes the difference in keeping your training cost-effective and avoiding unnecessary expenses.
When and How Often to Take an IPC
Planning frequency is like blending dreams with reality. It’s not as simple as a yearly dentist visit. Real flying is more about using your gym membership.
When you’re getting rusty, an IPC is needed as soon as you see mistakes. Like not staying on course, being late for briefings, or hesitating before talking back to control. Wait too long and the IFR price rises. What should be a quick fix turns into a full reset.
Training isn’t the same for everyone, as flight schools kindly point out. It means your training schedule and costs depend on your flying frequency, study habits, and memory.
To get your instrument rating, you need at least 40 hours of training. Yet, most pilots need around 45 hours. This extra time is your chance to cut costs or let them slip away based on how consistent you are.
| Timing trigger | What I usually see in real life | How it can affect instrument training price |
|---|---|---|
| Long break from IFR flying | More effort needed just to get back on pace | Leads to more dual time before you’re ready |
| Regular practice (short, frequent sessions) | Keeps skills sharp, fewer surprises in holds and approaches | Results in more consistent spending and fewer makeup lessons |
| Big admin bottlenecks | Written exams must be done at a specific office (for example, a Transport Canada office in Calgary in the provided data) | Causes delays that can extend training and bump up IFR cost |
| Check ride scheduling constraints | Flight exams booked with a named provider (for example, Excel Flight Training Incorporated) | Gaps in schedule may require extra flights to stay sharp |
My top advice on frequency is simple: treat IFR like exercise. Frequent short sessions are better than rare long ones. They’re a great way to keep costs down.
If saving money is important, arrange practice sessions before needing an IPC. This way, you avoid losing confidence. It helps keep your IFR expenses steady and prevents training costs from rising due to extra hours or stress.
Post-IPC Steps
The IPC is over, and now it’s time for less exciting tasks. You need to update your logbook, get your instructor’s approval, and check your FAA records. If you miss something, you might find out at a really bad time. Like when bad weather is coming and your documents are not in order.
Now, let’s talk about the costs of getting an instrument rating. Be honest with yourself about the expenses. They include about $600 for optional ground school, around $100 for materials, and other fees that add up quickly. Don’t forget licensing fees that could reach $545. Plus, there might be taxes and unexpected costs at some schools.
To save money on your instrument rating, focus on what you can manage. Make sure you have all required documents and prerequisites. This includes a Private Pilot License and a Category 3 medical certificate. If you’re studying from another country, ensure the program is officially recognized to avoid extra costs.
Keep your skills sharp to protect your investment. Practice with a simulator, fly with a safety pilot, and stick to a simple routine for instrument scanning. Staying sharp saves money in the long run. It’s costly to retrain and regain currency in flying if you let your skills lapse.