Airplanes naturally want to weather-vane into the wind. Touching down with the nose pointed off the runway centerline places immense side-load stress on the landing gear. Student pilots frequently struggle with crosswind landings during their initial training; the maneuver requires uncoupling the flight controls. You must use the rudder to control the nose direction and the ailerons to control the drift. Achieving your first solo flight success demands strict proficiency in these uncoordinated flight techniques. Reviewing the official aerodynamic explanations in the FAA Airplane Flying Handbook provides the foundational theory required to execute this maneuver safely.
The Crab Method On Final Approach
Flying a stabilized approach sets the stage for a safe touchdown. Most flight instructors teach the crab method for the initial segment of the final approach. A pilot points the nose of the aircraft into the wind just enough to track straight down the extended runway centerline. This keeps the wings perfectly level and requires zero cross-control inputs, reducing the physical workload as you manage flaps and airspeed. Just before the flare, the pilot must transition the aircraft out of the crab to prevent side-loading the tires upon touchdown.
Comparing Landing Techniques
| Technique | Execution | Primary Benefit |
| Crab Method | Pointing the aircraft nose into the wind. | Keeps the wings level and reduces pilot fatigue on long final approaches. |
| Wing-Low Sideslip | Aileron into the wind, opposite rudder. | Aligns the wheels directly with the runway centerline for touchdown. |
Executing The Wing-Low Sideslip
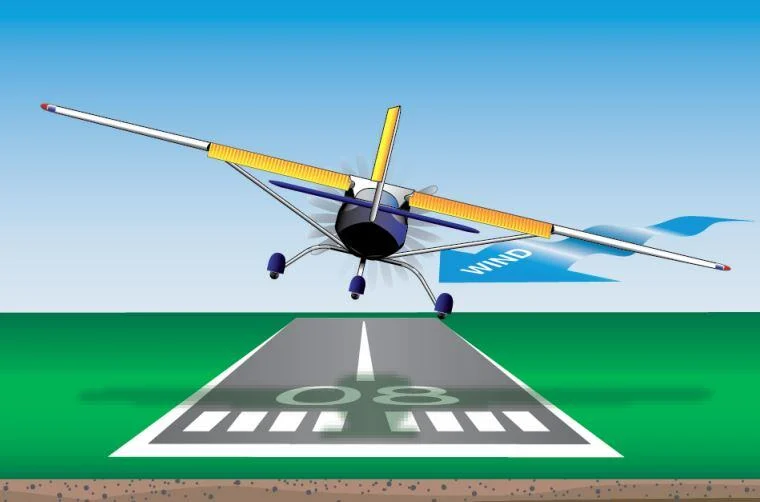
Transitioning from the crab requires immediate, decisive control inputs. You apply rudder to align the longitudinal axis of the airplane directly with the runway centerline. The wind will immediately push the aircraft off course. You counter this drift by applying aileron pressure into the wind, lowering the upwind wing. The airplane flies in a forward slip straight down the centerline.
The upwind main landing gear touches the pavement first, followed by the downwind main wheel, and finally the nose gear. Pilots who figure out how to build flight hours efficiently as a student pilot spend significant time practicing this sideslip in the practice area at altitude before bringing it down to the runway. Nailing the coordination at a safe altitude builds the muscle memory needed for the actual landing flare.
Establishing Personal Minimums And Go-Arounds
Every aircraft manufacturer publishes a maximum demonstrated crosswind component in the Pilot’s Operating Handbook. This number represents the maximum wind velocity the test pilot successfully landed in during certification. It acts as a guideline, not a hard structural limit. Smart students set personal minimums far below this published number. Setting a hard limit of a five-knot crosswind component during early training prevents you from encountering situations that exceed your current motor skills.
Checking the surface observation reports on the National Weather Service Aviation Weather portal before engine start gives you a factual basis for your go/no-go decision. If the wind gusts suddenly during the flare and pushes you off the centerline, apply full power and execute a go-around. A go-around is a free maneuver that protects your life and the aircraft.